Connect your AWS account - FinOps & Diagrams
To retrieve your billing info and understand your infrastructure, Holori needs access to your AWS account. This procedure is made in full compliance with AWS's access rules. We will guide you step by step through this configuration process.
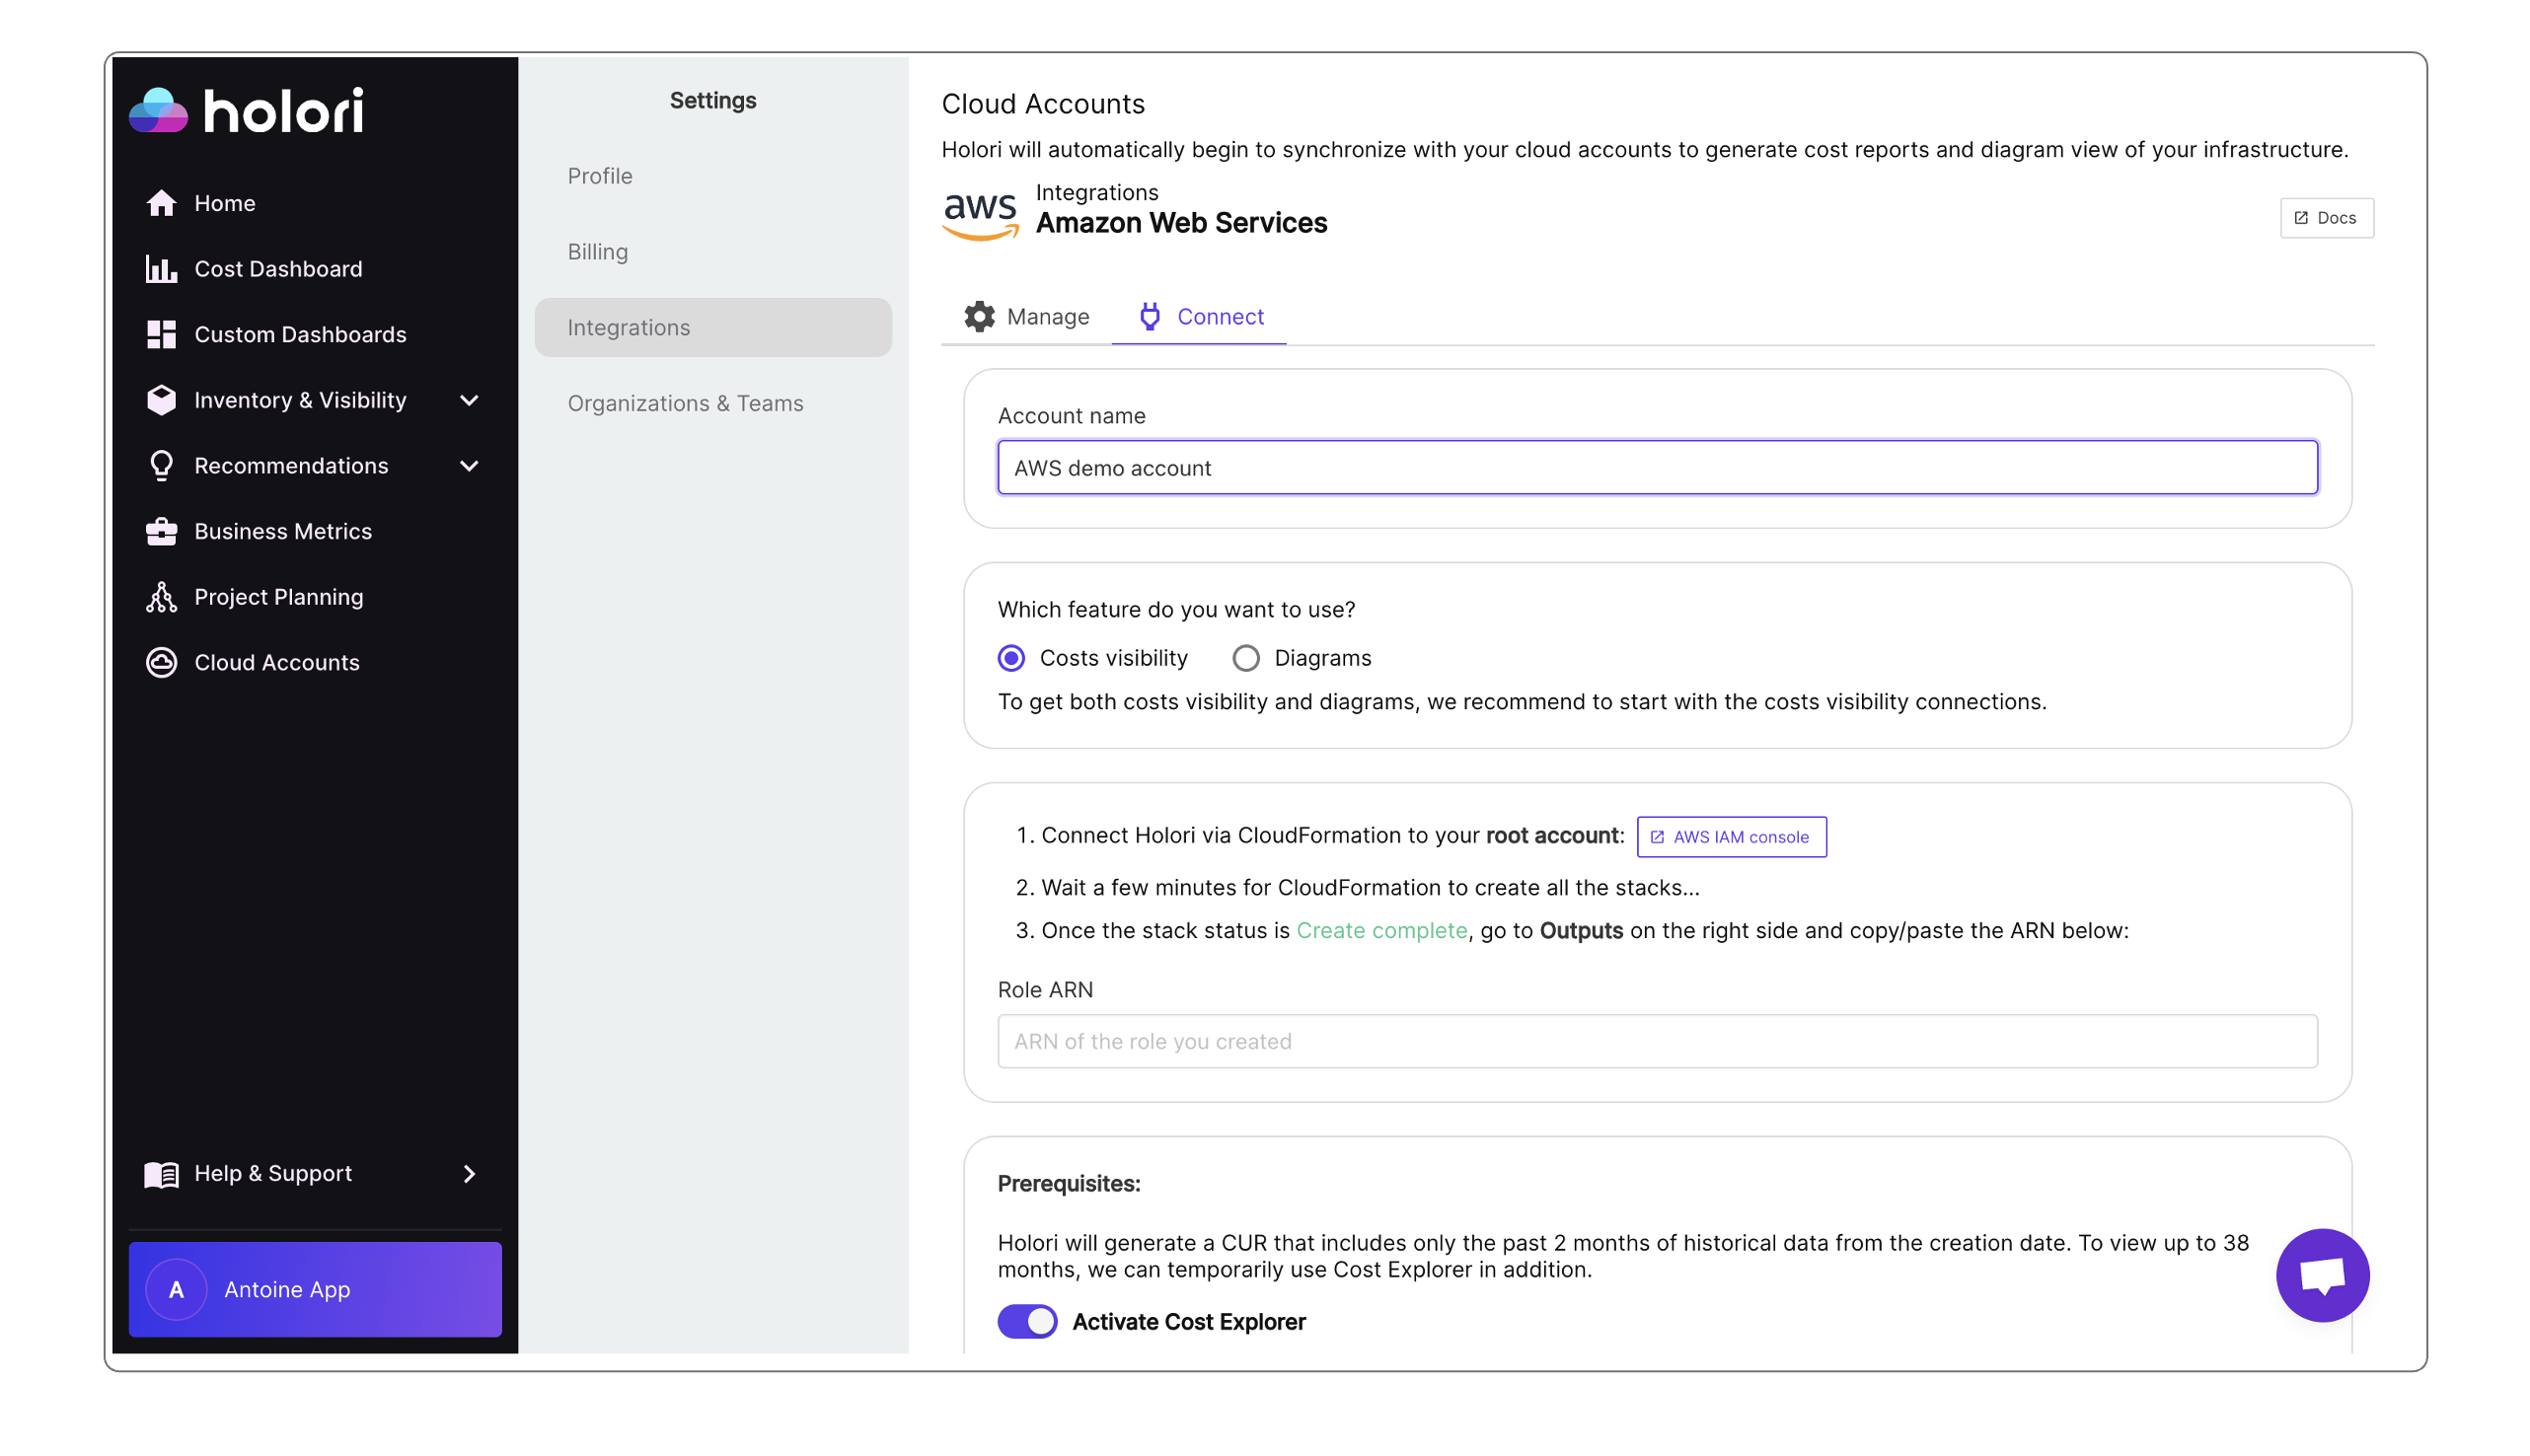
In Holori App, click on your username at the bottom left of the page, then select the "Integrations" tab and click on "+Connect now" under the AWS logo.
You must first define which feature you want to use between cost visibility + diagrams and diagrams only
The following procedure is for COST VISIBILITY + DIAGRAMS.
Video demo
Step by step procedure:
Step 1: Use CloudFormation
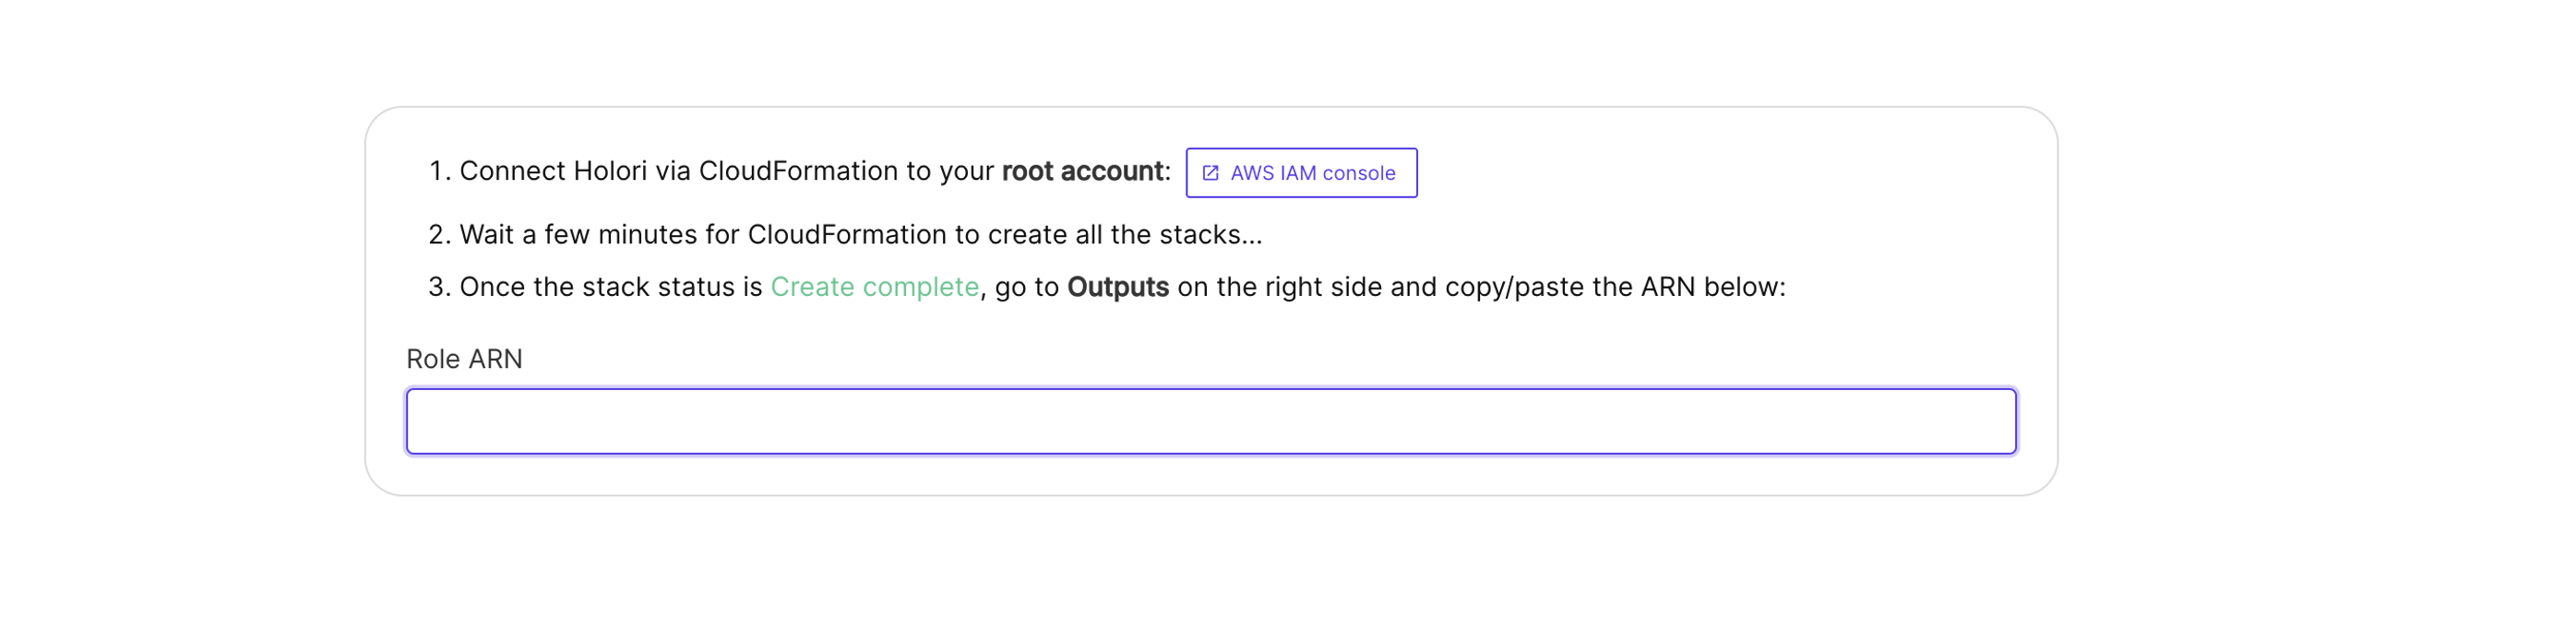
Connect Holori via CloudFormation to your root account. Use the link that is provided on Holori App / Integrations / AWS.
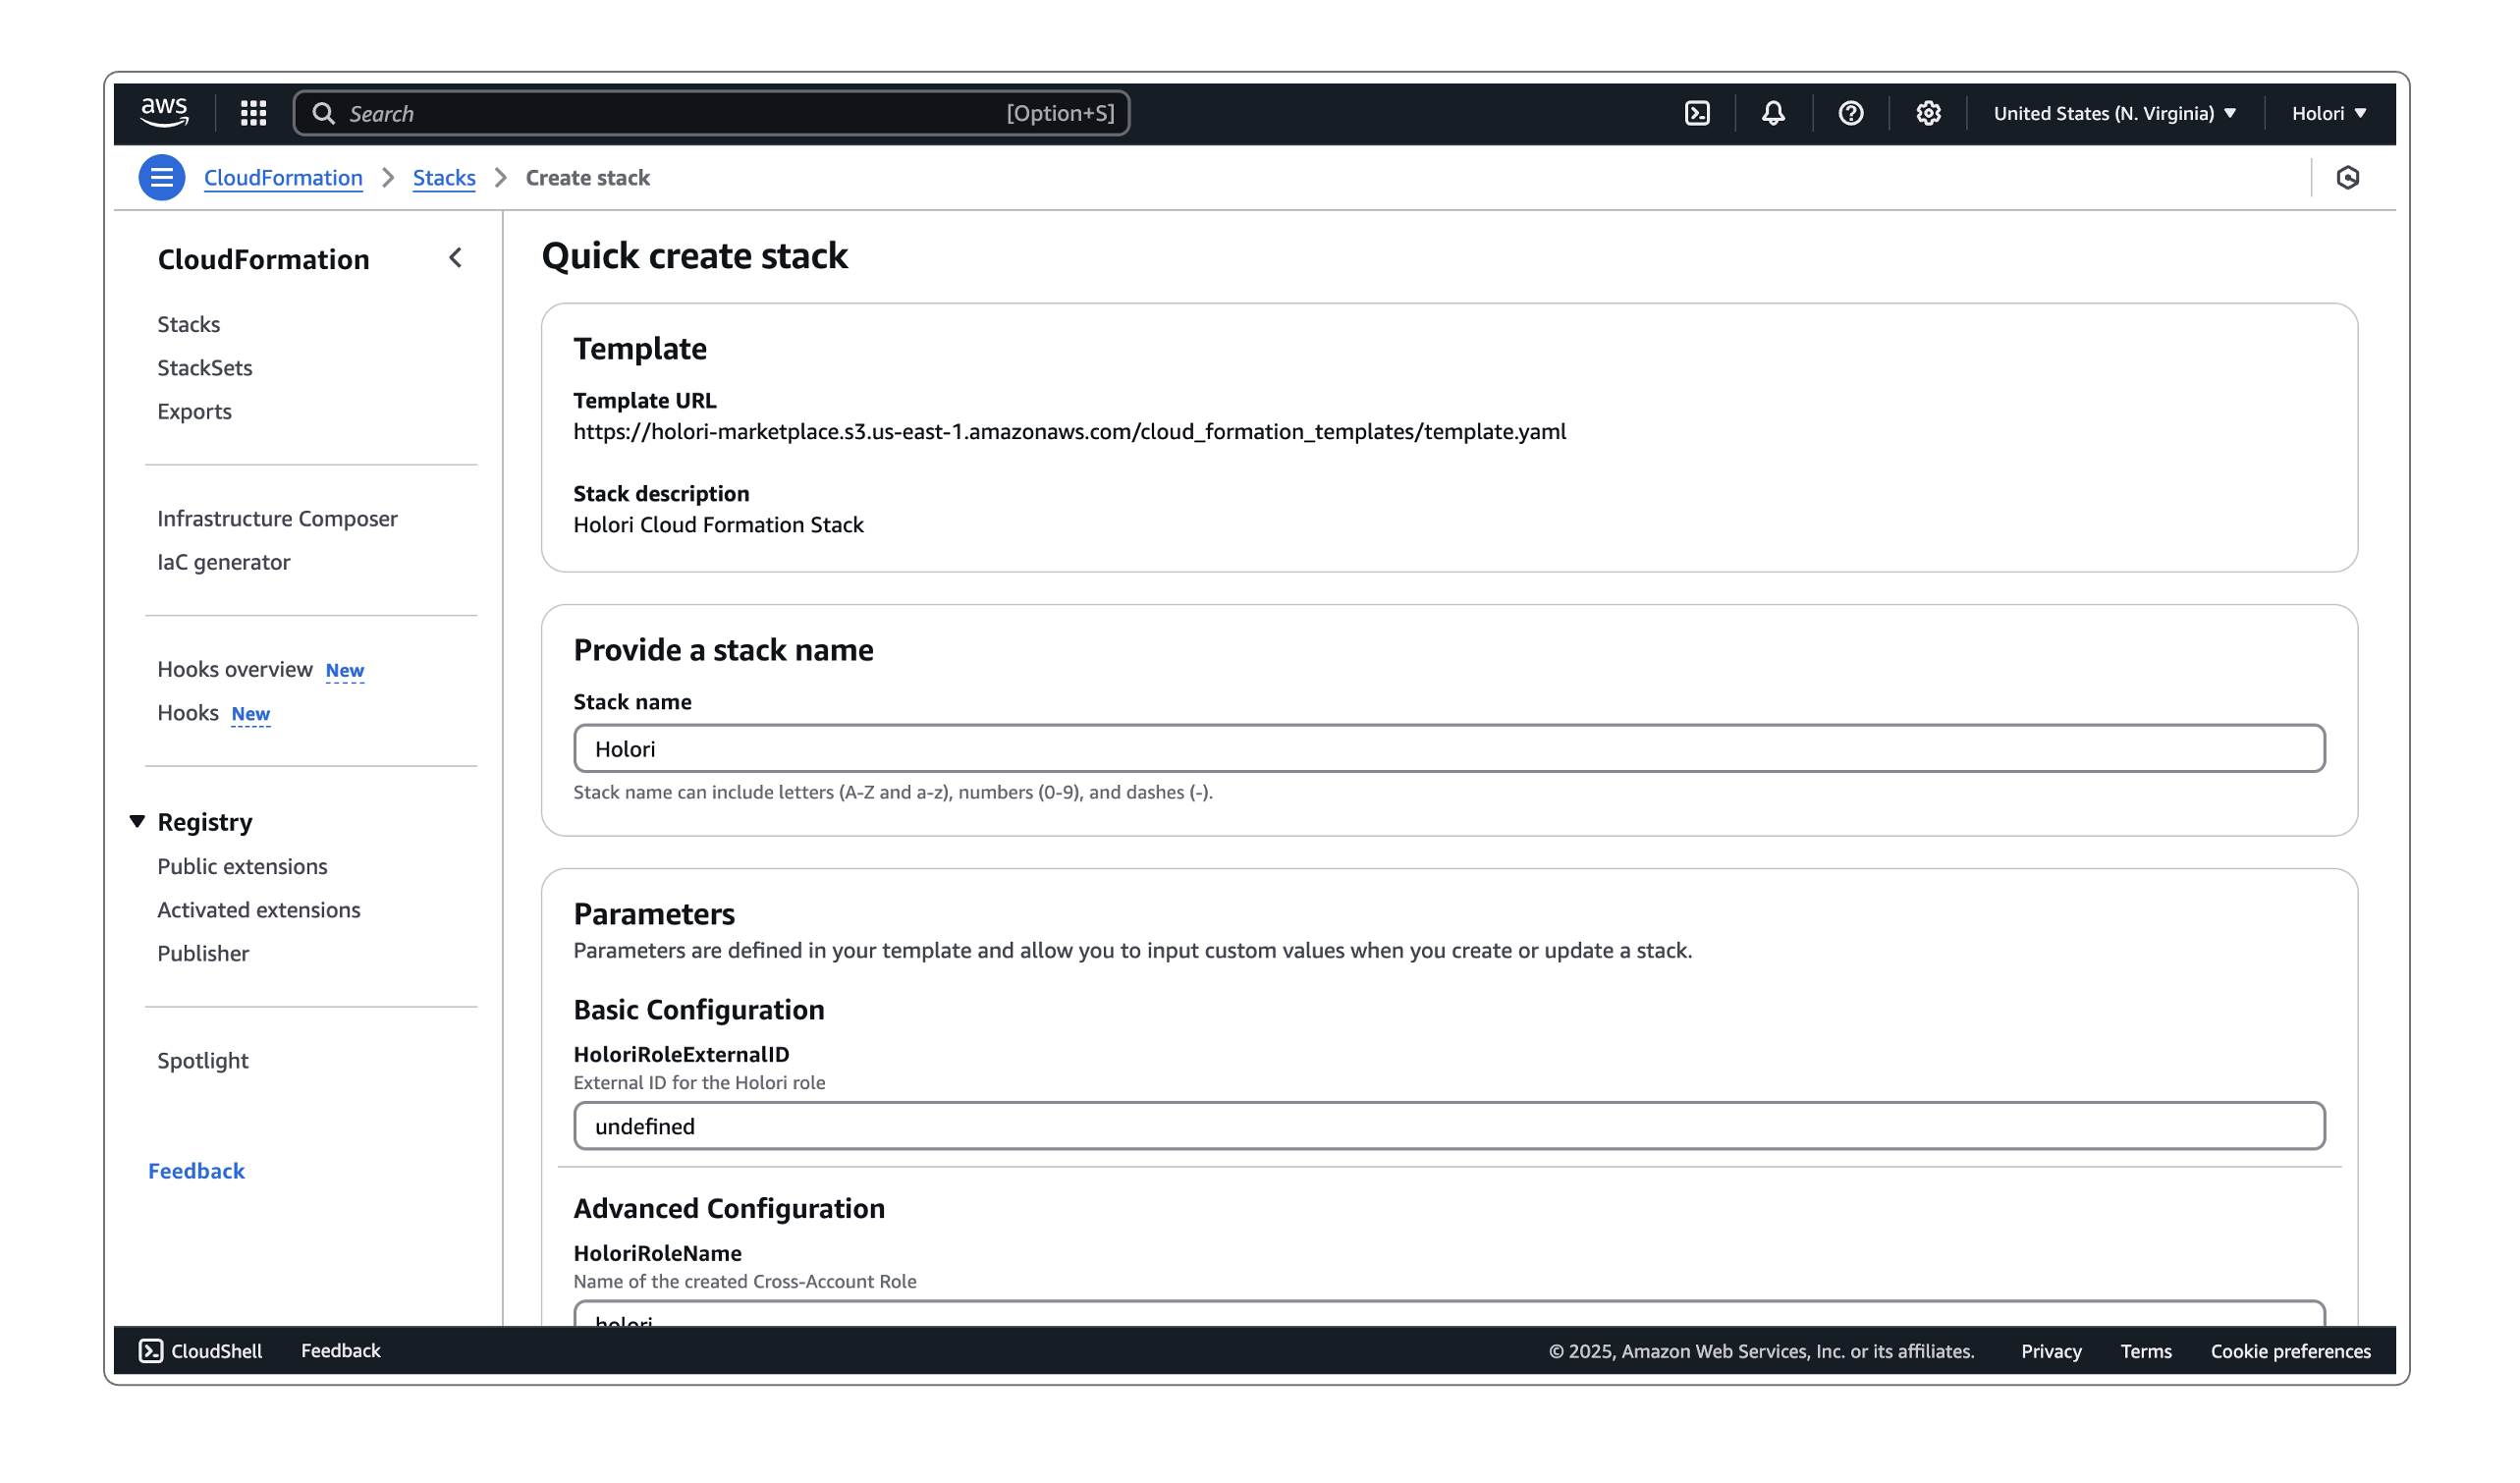
In a few clicks, CloudFormation creates all the required permissions.
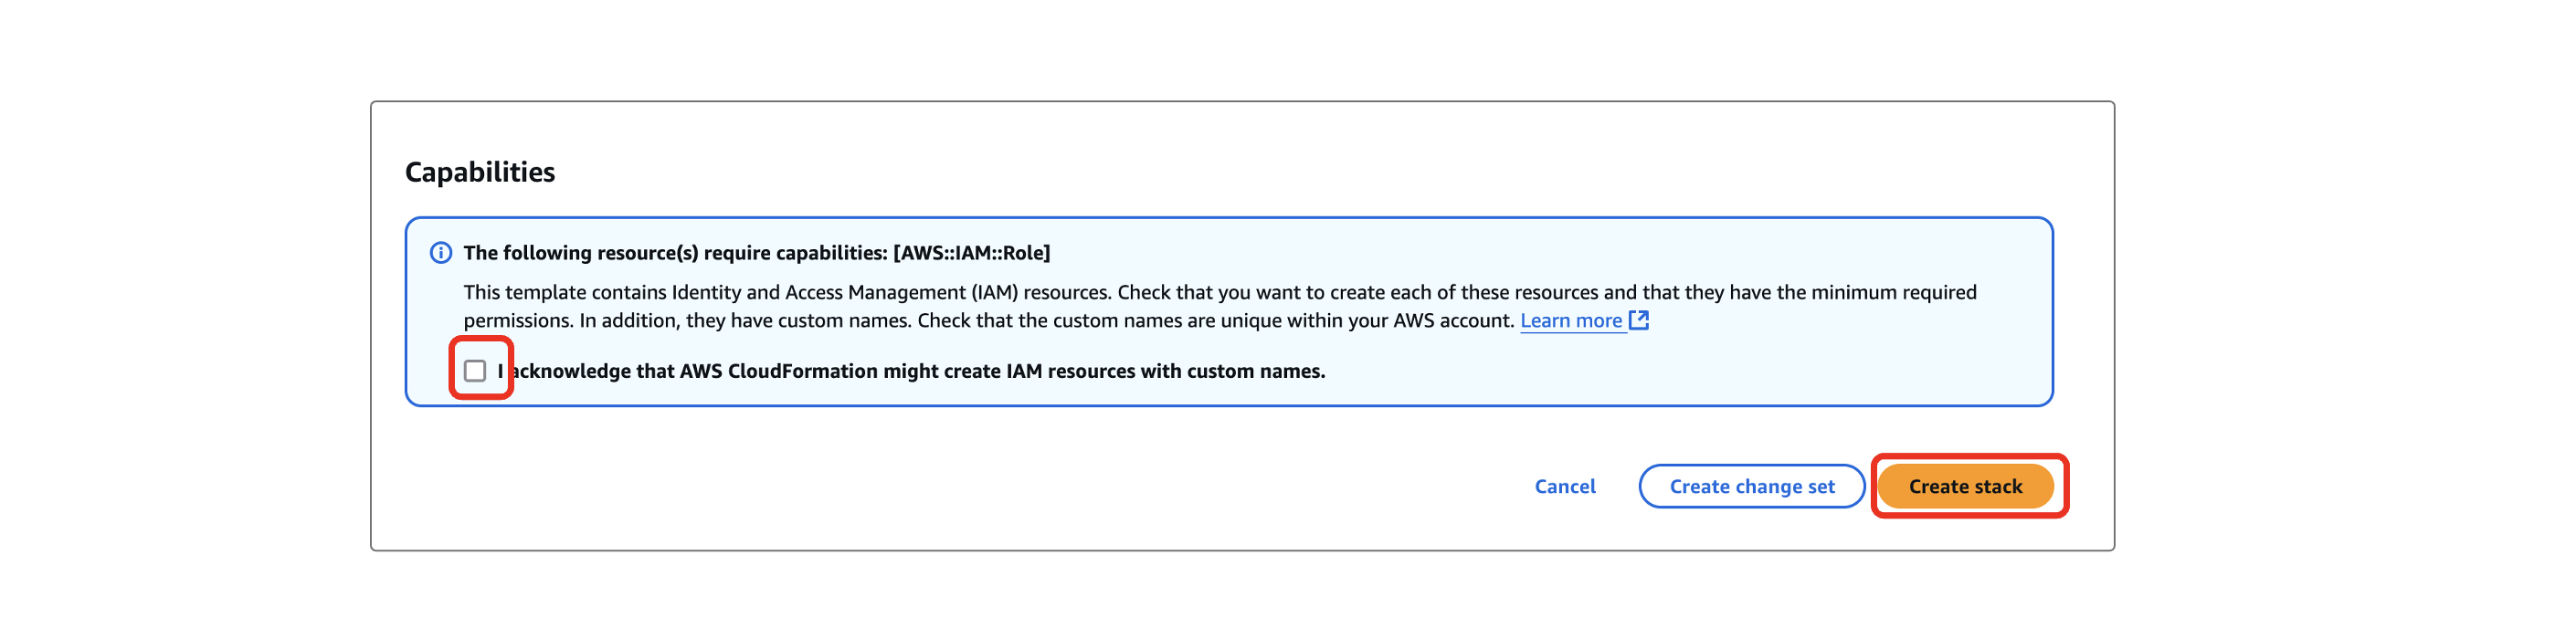
At the bottom of the AWS console page, ensure you check the last box before clicking on 'Create stack', then wait a few minutes.
Step 2: Get the ARN
Once the stack status is Create complete, go to Outputs on the right side and copy the ARN.
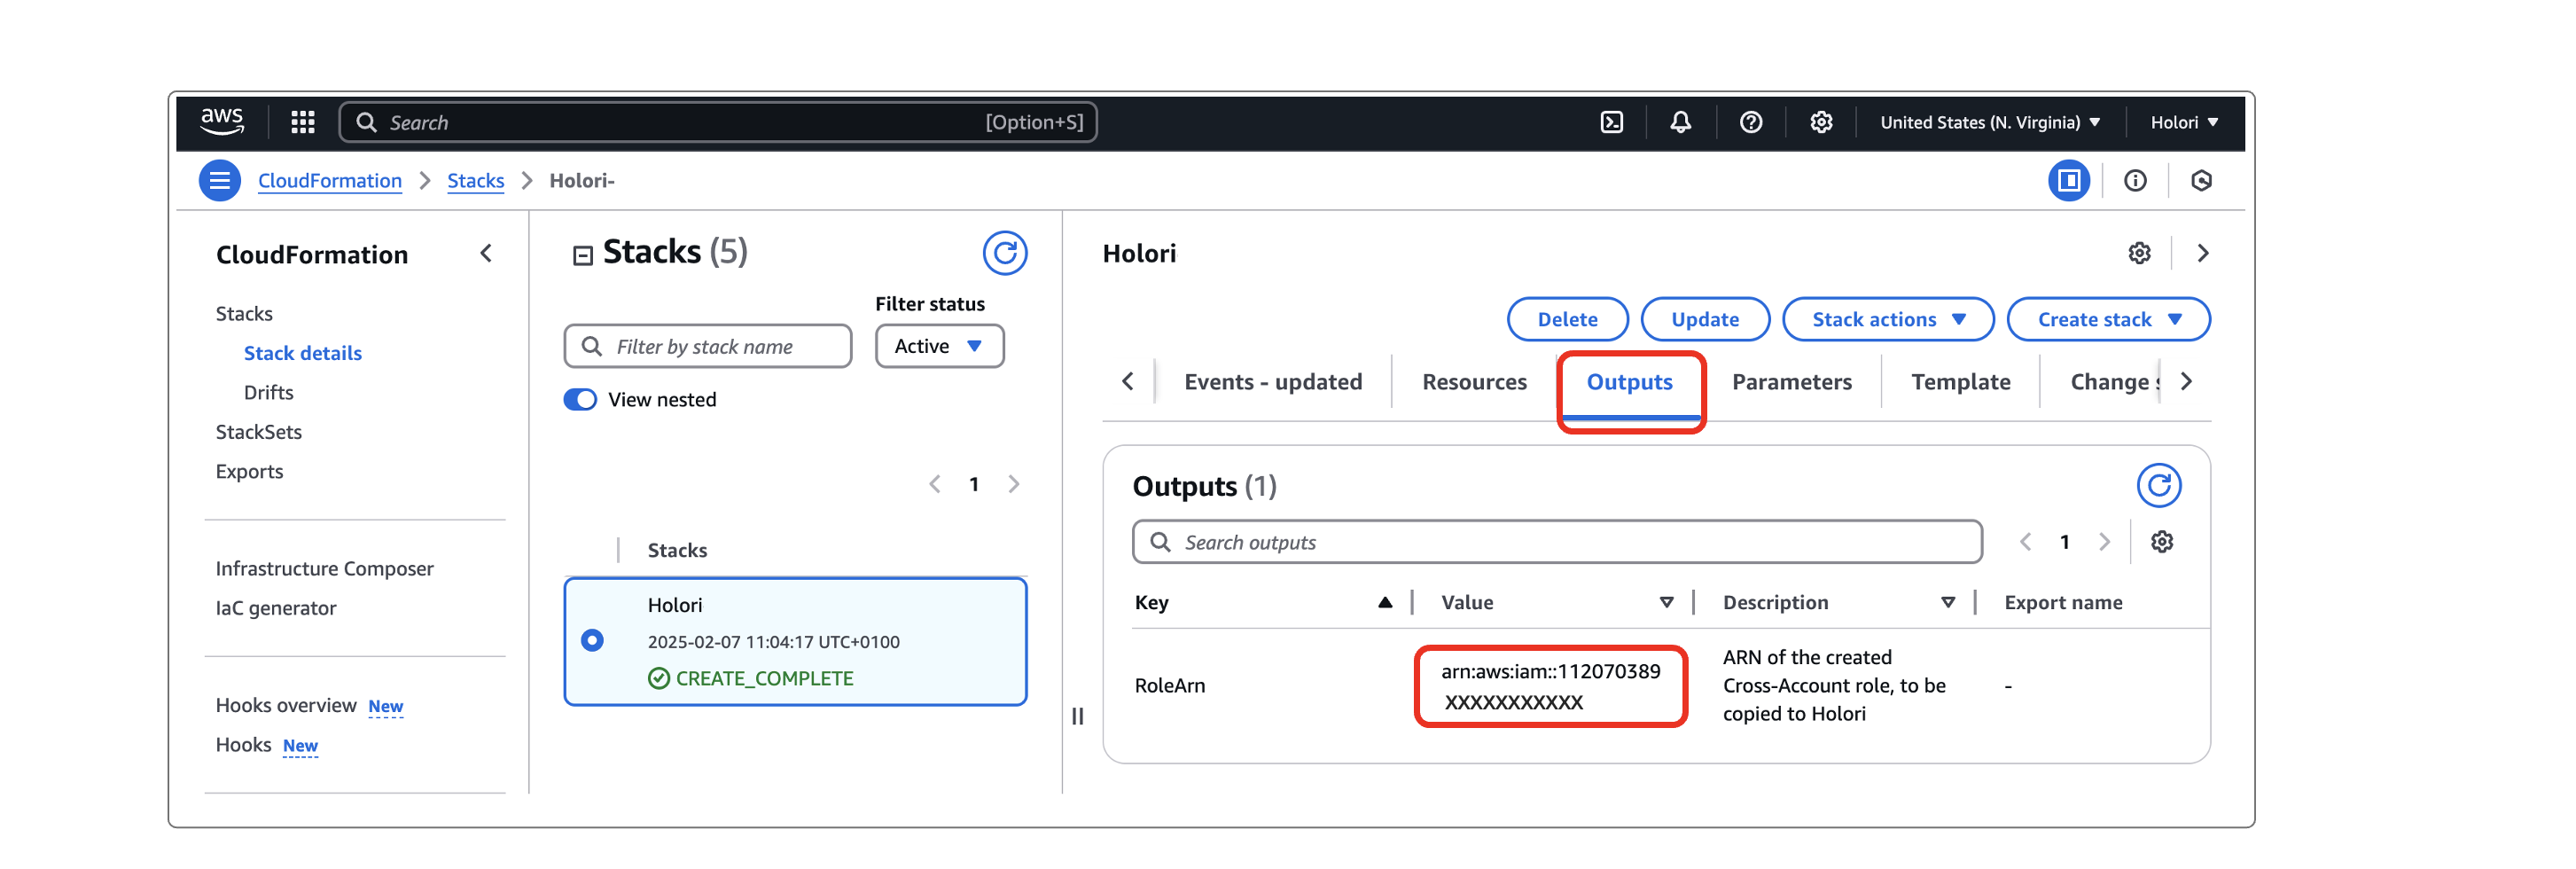
Paste the ARN in the corresponding field on Holori App.
Prerequisite
Holori will generate a CUR that includes costs since the beginning of the month. To view up to 36 months, we can temporarily use Cost Explorer in addition.
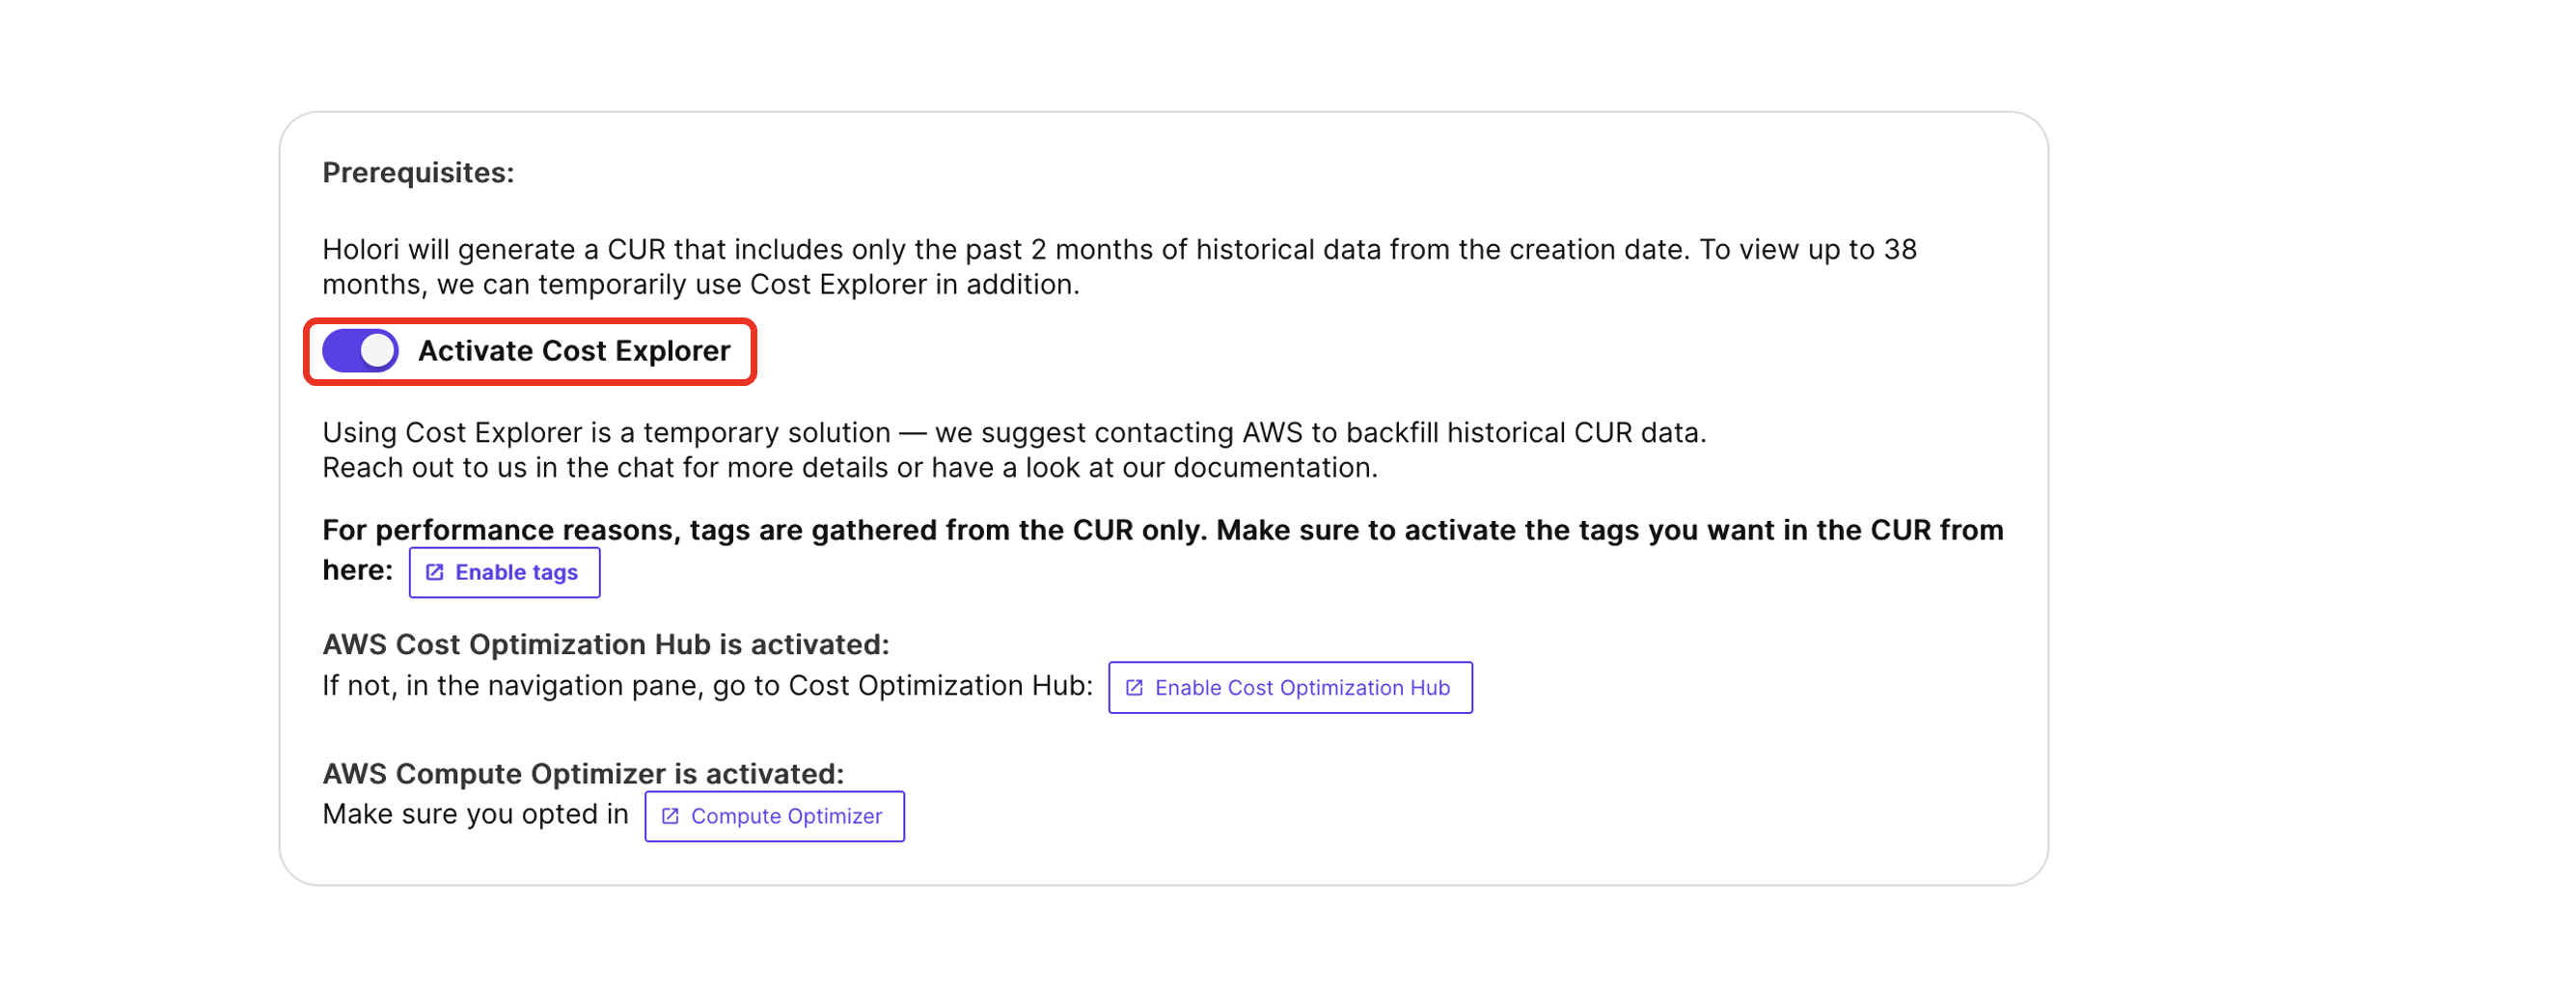
Please note that using Cost Explorer is a temporary solution — we suggest contacting AWS to backfill historical CUR data. Scroll down to get the request template to send to AWS.
Step 3 : Enable cost retrieval from your AWS account
Cost Explorer
Enable Cost Explorer Then navigate to Cost Management preferences, and to the Cost Explorer tab. Make sure that the following configuration is selected:
- Enable Historical data up to 36 months
- Resource level data at daily granularity (up to 14 days)
Cost Optimization Hub
AWS Cost Optimization Hub must be activated: In the navigation panel, go to Cost Optimization Hub For the detailed procedure, visit AWS documentation page here.
AWS Compute Optimizer
AWS Compute Optimizer must be activated. Make sure you opted in.
Once you have performed all the steps above, on Holori App, click Save at the bottom of AWS integration page. Your account will be synchronized.
The initial CUR generation by AWS takes 24 hours, please be patient and come back later once the data is made available and imported in Holori.
Request CUR Backfill Data Export
You can now create a Support Case requesting a backfill of your CUR reports with up to 36 months of historical data.
Case must be created from each of your Source Accounts (Typically Management/Payer Accounts).
Service: Billing
Category: Other Billing Questions
Subject: Backfill Data

Hello Dear Billing Team,
Please can you backfill the data in DataExport named `holori-cost-export` for last 36 months.
Thanks in advance,
You can also use following command in CloudShell to create this case via command line:
aws support create-case \
	--subject "Backfill Data" \
	--service-code "billing" \
	--severity-code "normal" \
	--category-code "other-billing-questions" \
	--communication-body "
		Hello Dear Billing Team,
		Please can you backfill the data in DataExport named 'holori-cost-export' for last 36 months.
		Thanks in advance"
Request Cost Allocation Tags in CUR
On your AWS console, using the search bar, search for "Cost allocation tags". Open the suggestion that pops up.
On the page, in the table at the bottom, check the tags you want to activate. Once done click on the "Activate" button on the top righ corner of the table.
You can also request a backfill of your tags using the "Backfill tags" button on the top right corner of the page.