Connect your OCI account - Focus version - This page is being edited at the moment, new version arriving soon!
Holori offers a an OCI Finops solution to help you track and optimize Oracle Cloud costs.
In Holori App, select "cloud accounts" on the left menu and click on "+Connect now" under the OCI logo.
Step 1: Open your OCI Dashboard
Navigate to your OCI console and select your root tenancy.
Step 2: Tenancy Details
In the Tenancy Details page, copy your Root Tenancy OCID, your object storage namespace. Paste them in the corresponding fields on Holori App.

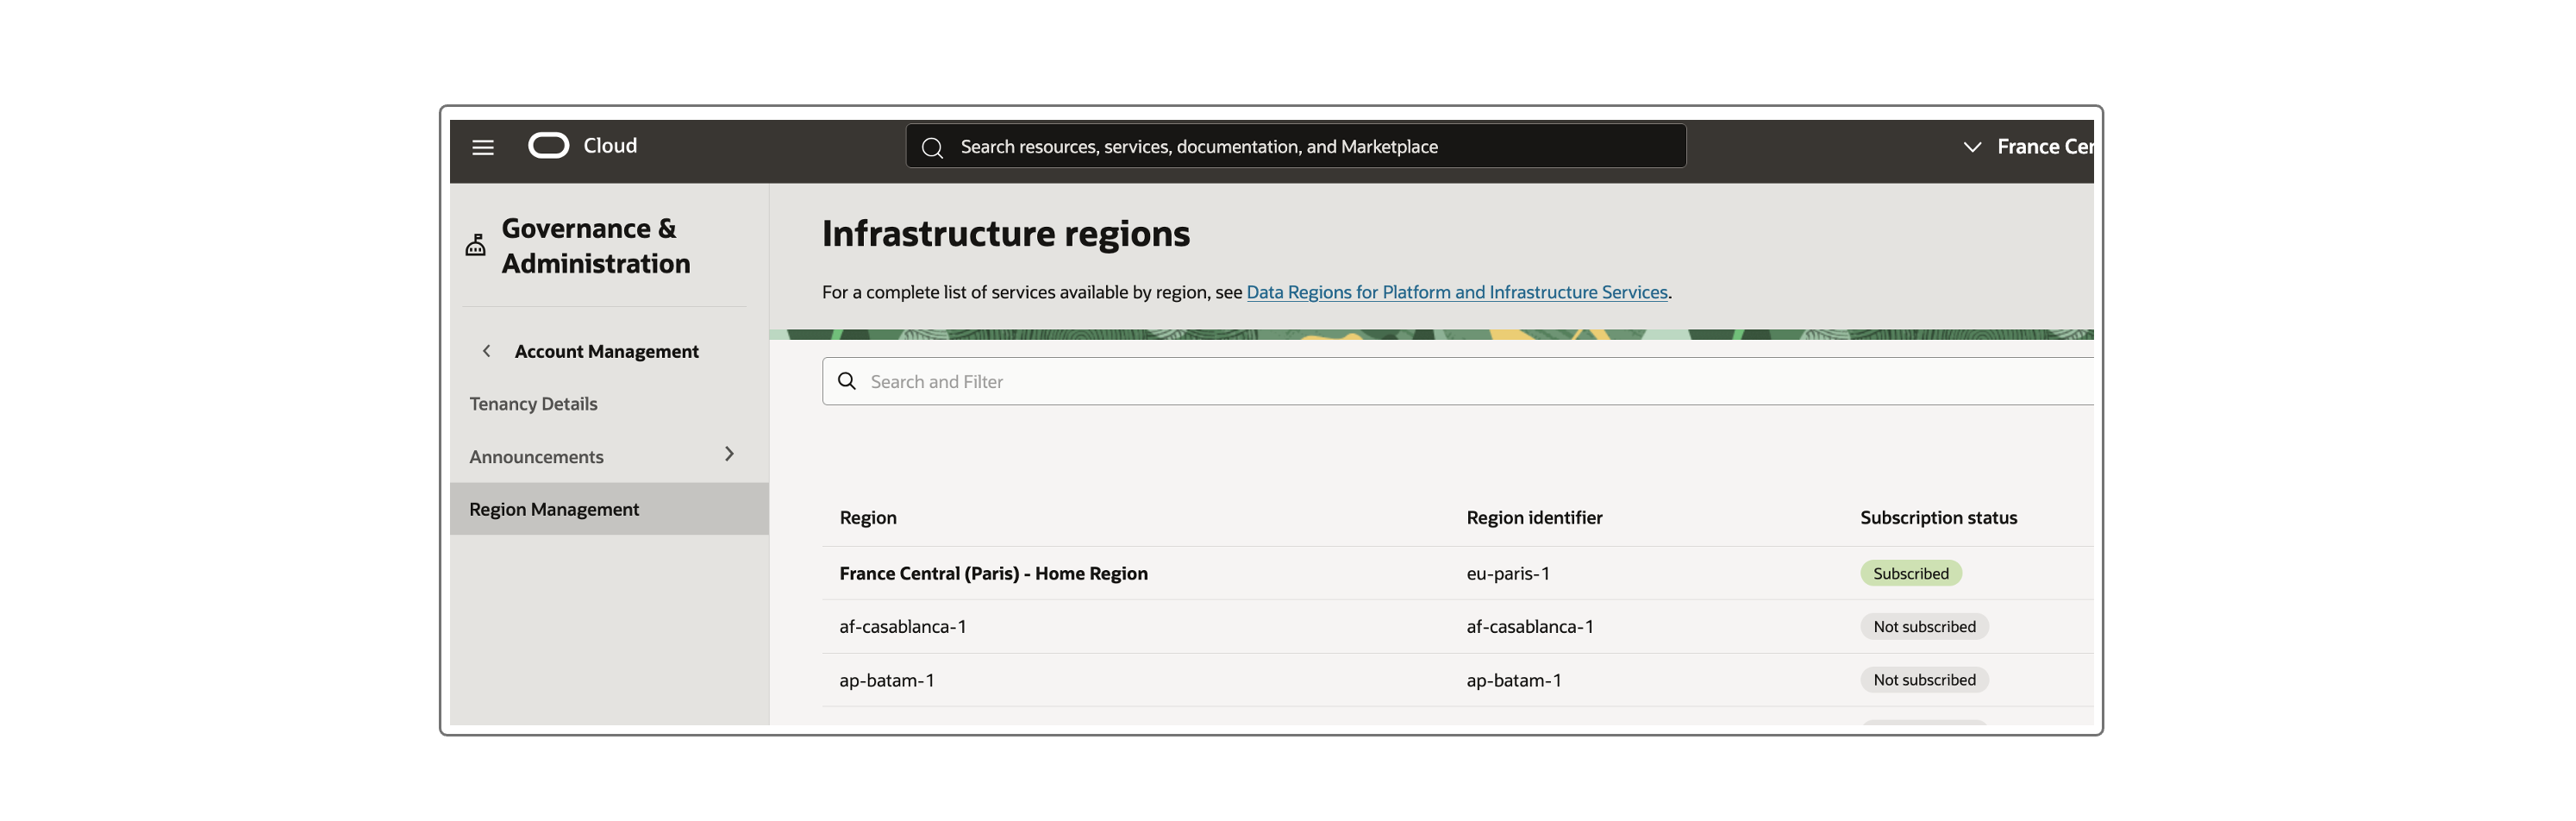
In the Regions Management page, you'll find your home region. Copy its identifier and paste it in Holori app.
Step 3: Create a dedicated group for Holori
Navigate to: https://cloud.oracle.com/identity/domains
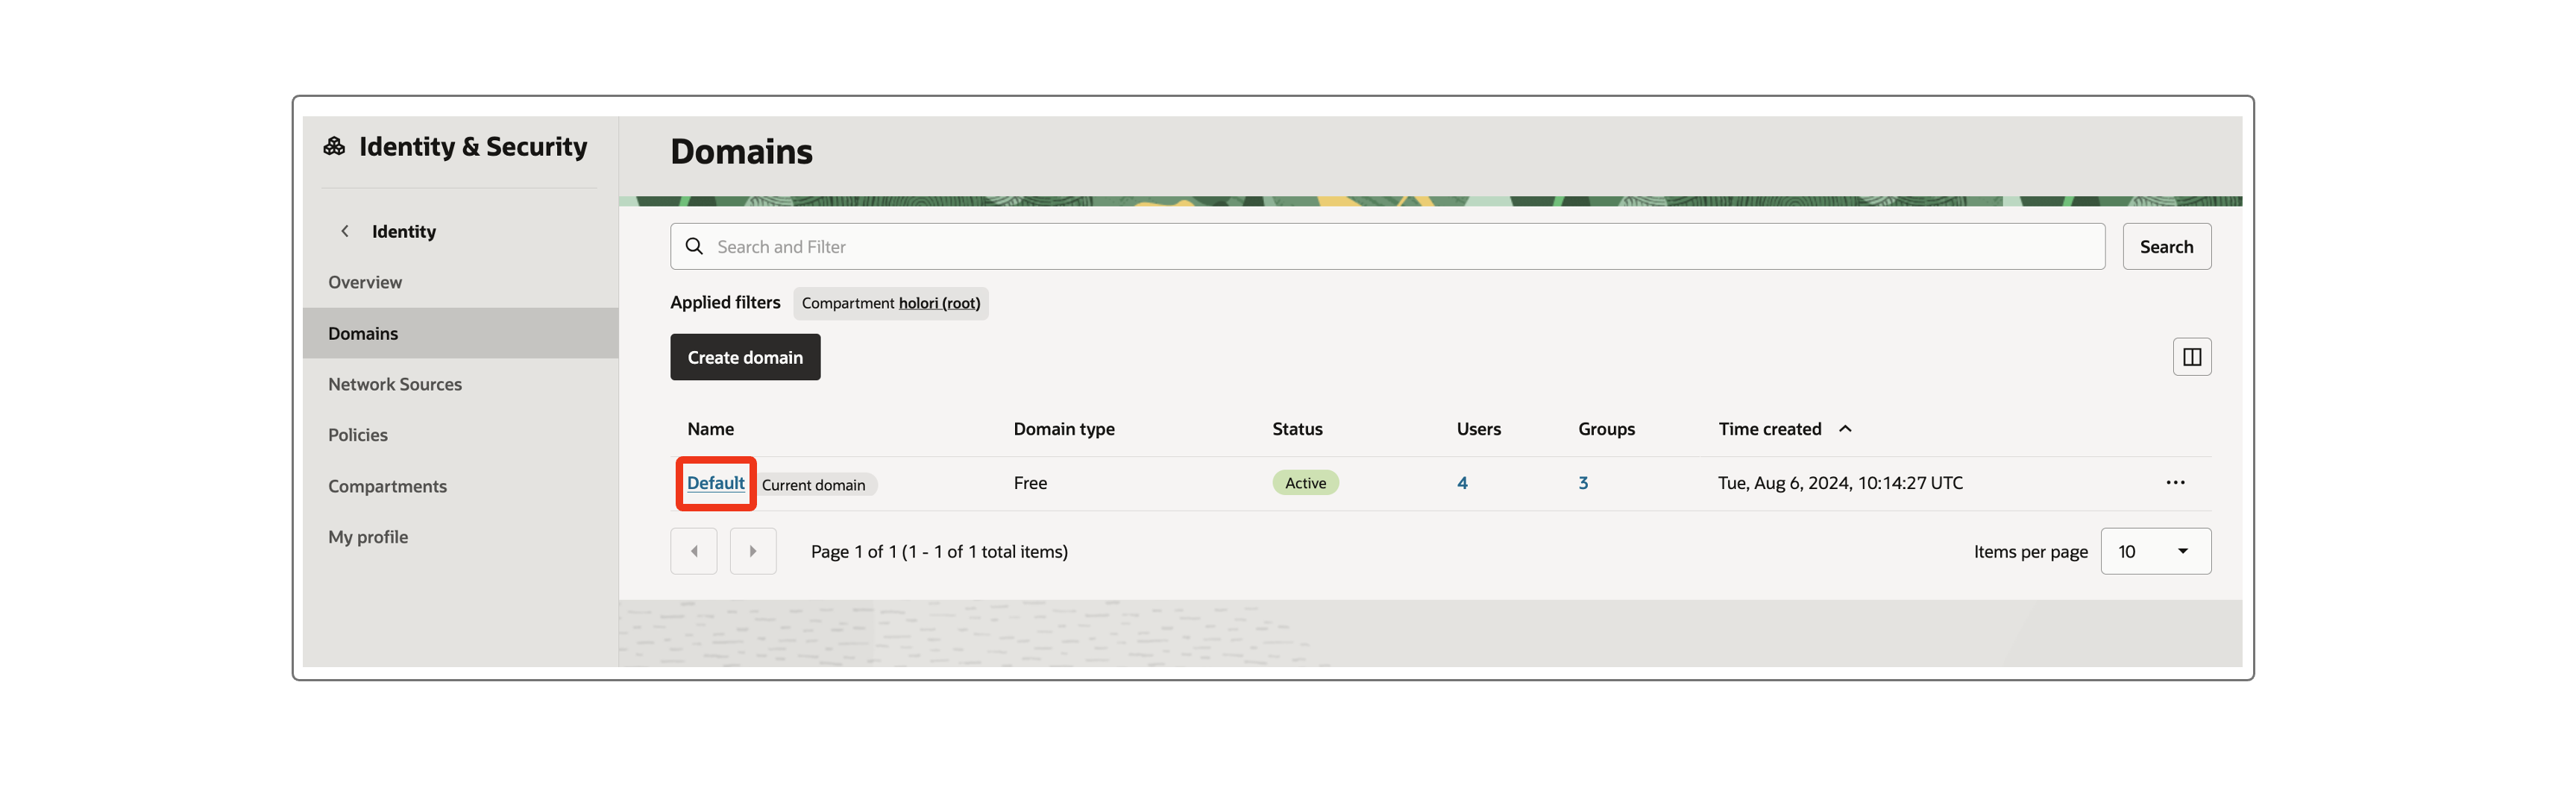
- Click on the Default domain
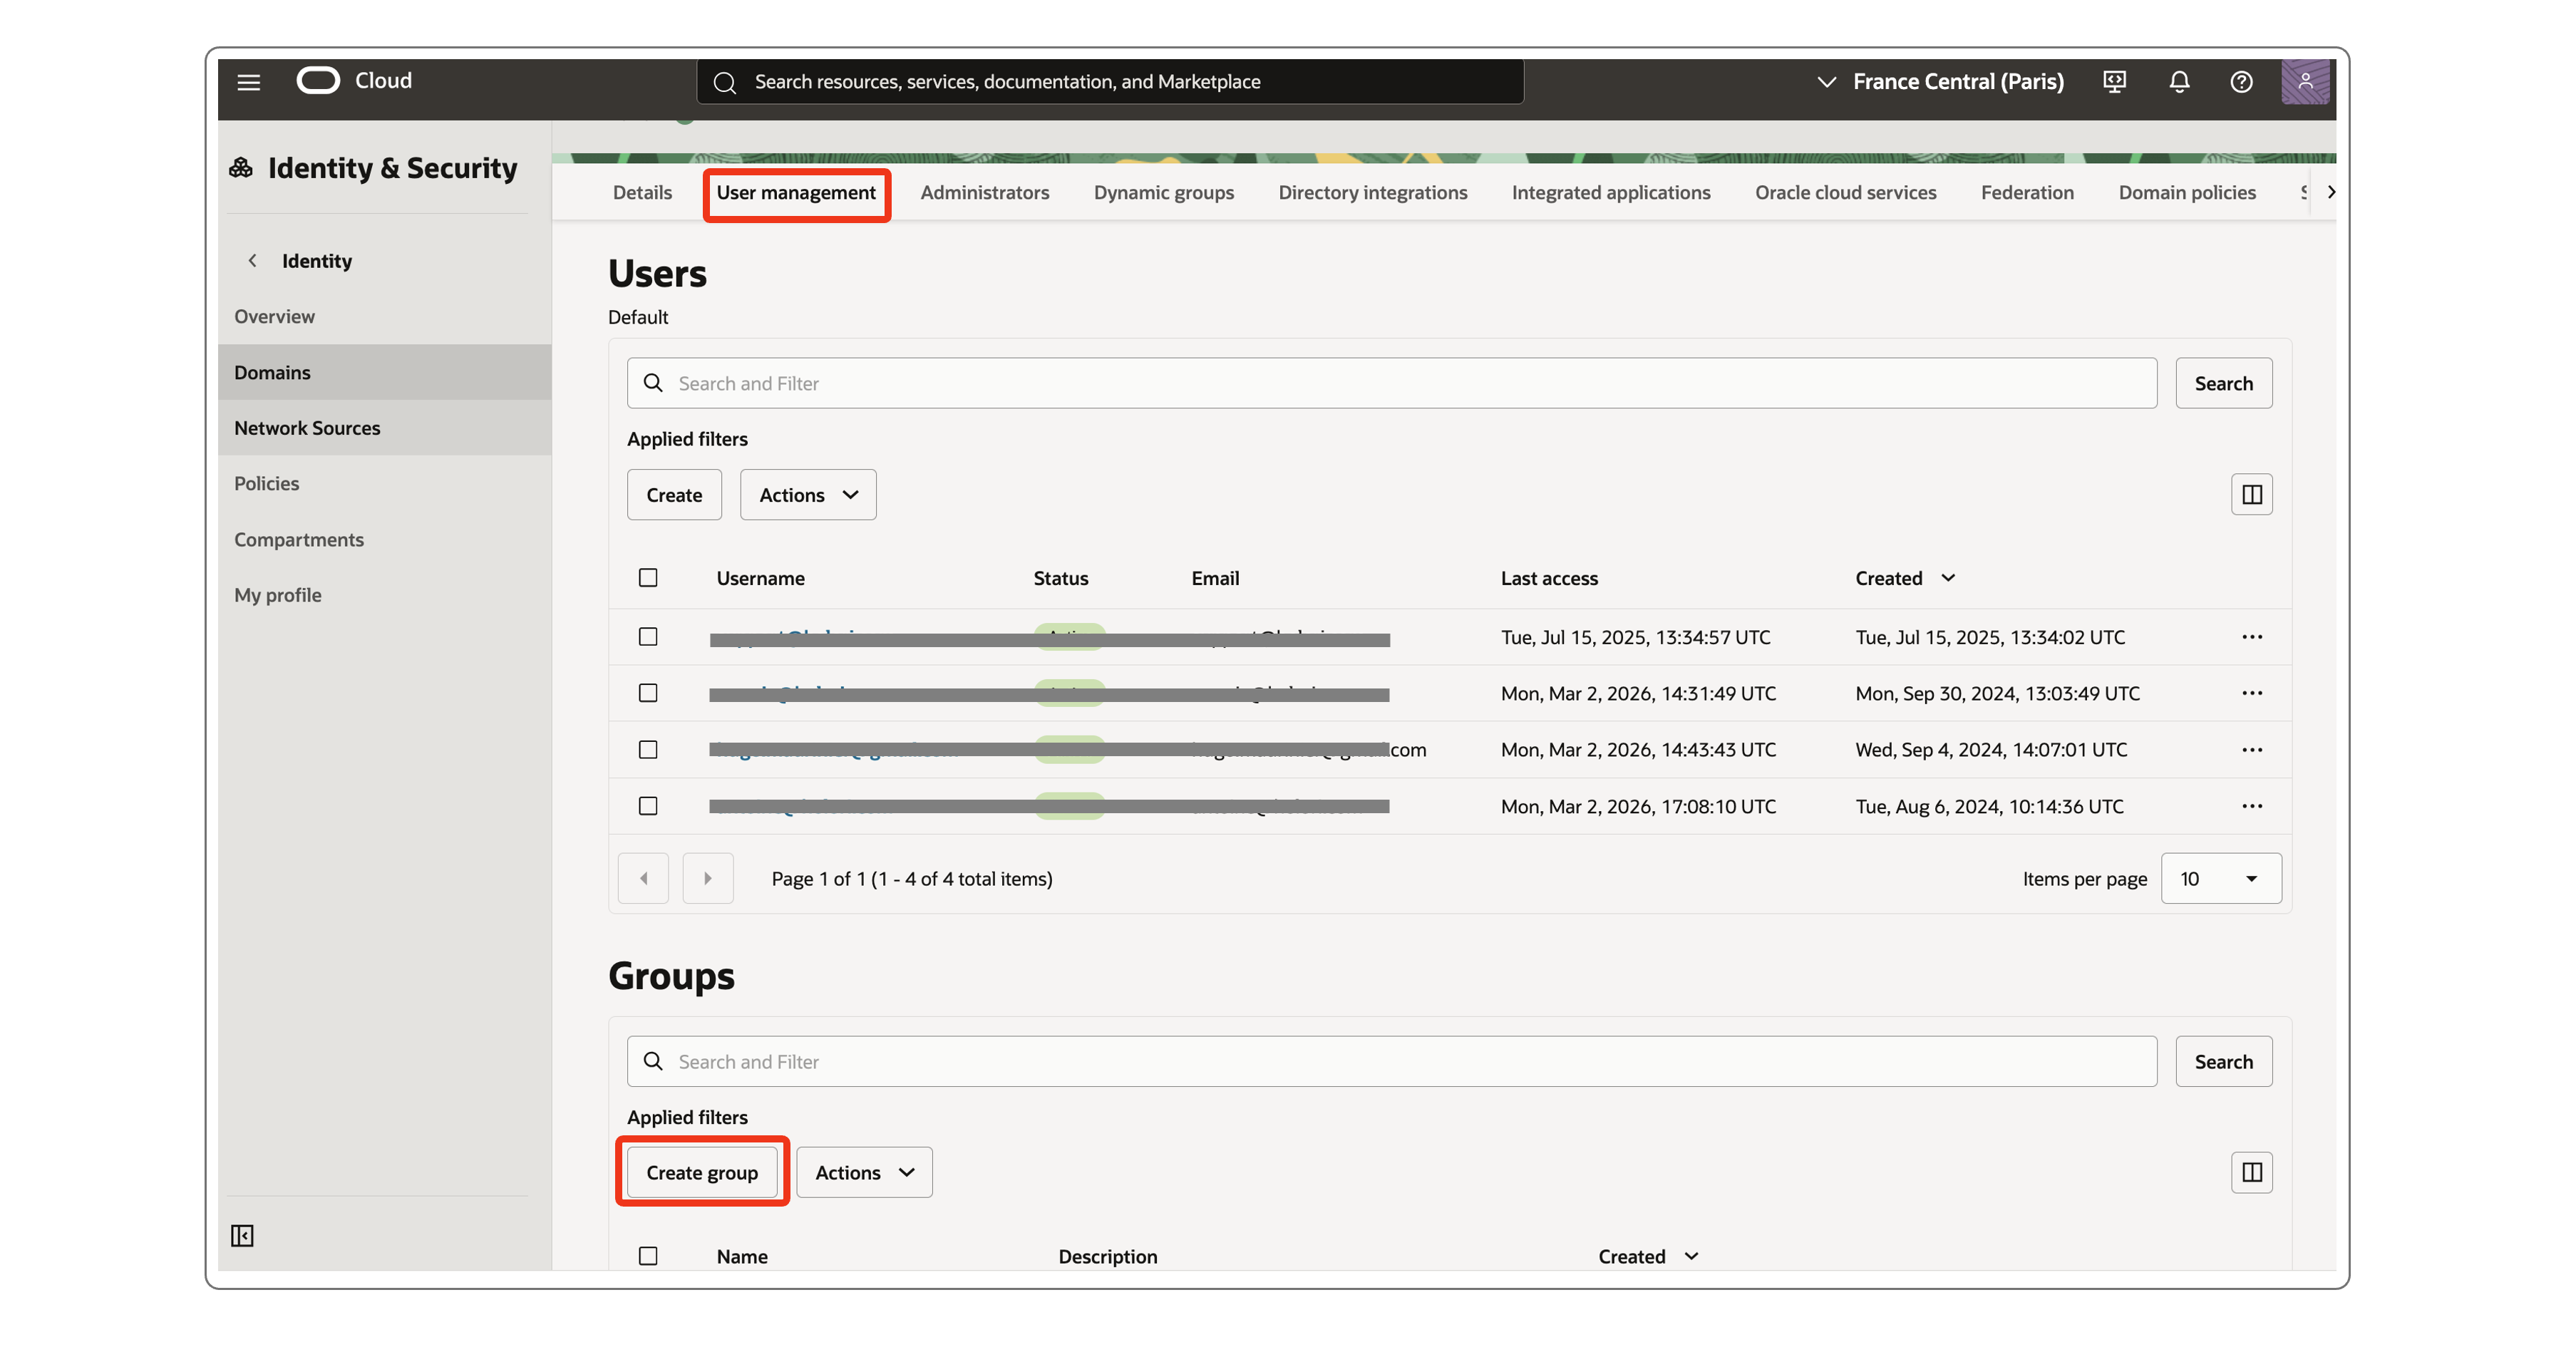
- Open the User management tab
- Scroll down to the Groups section
- Click on the Create group button
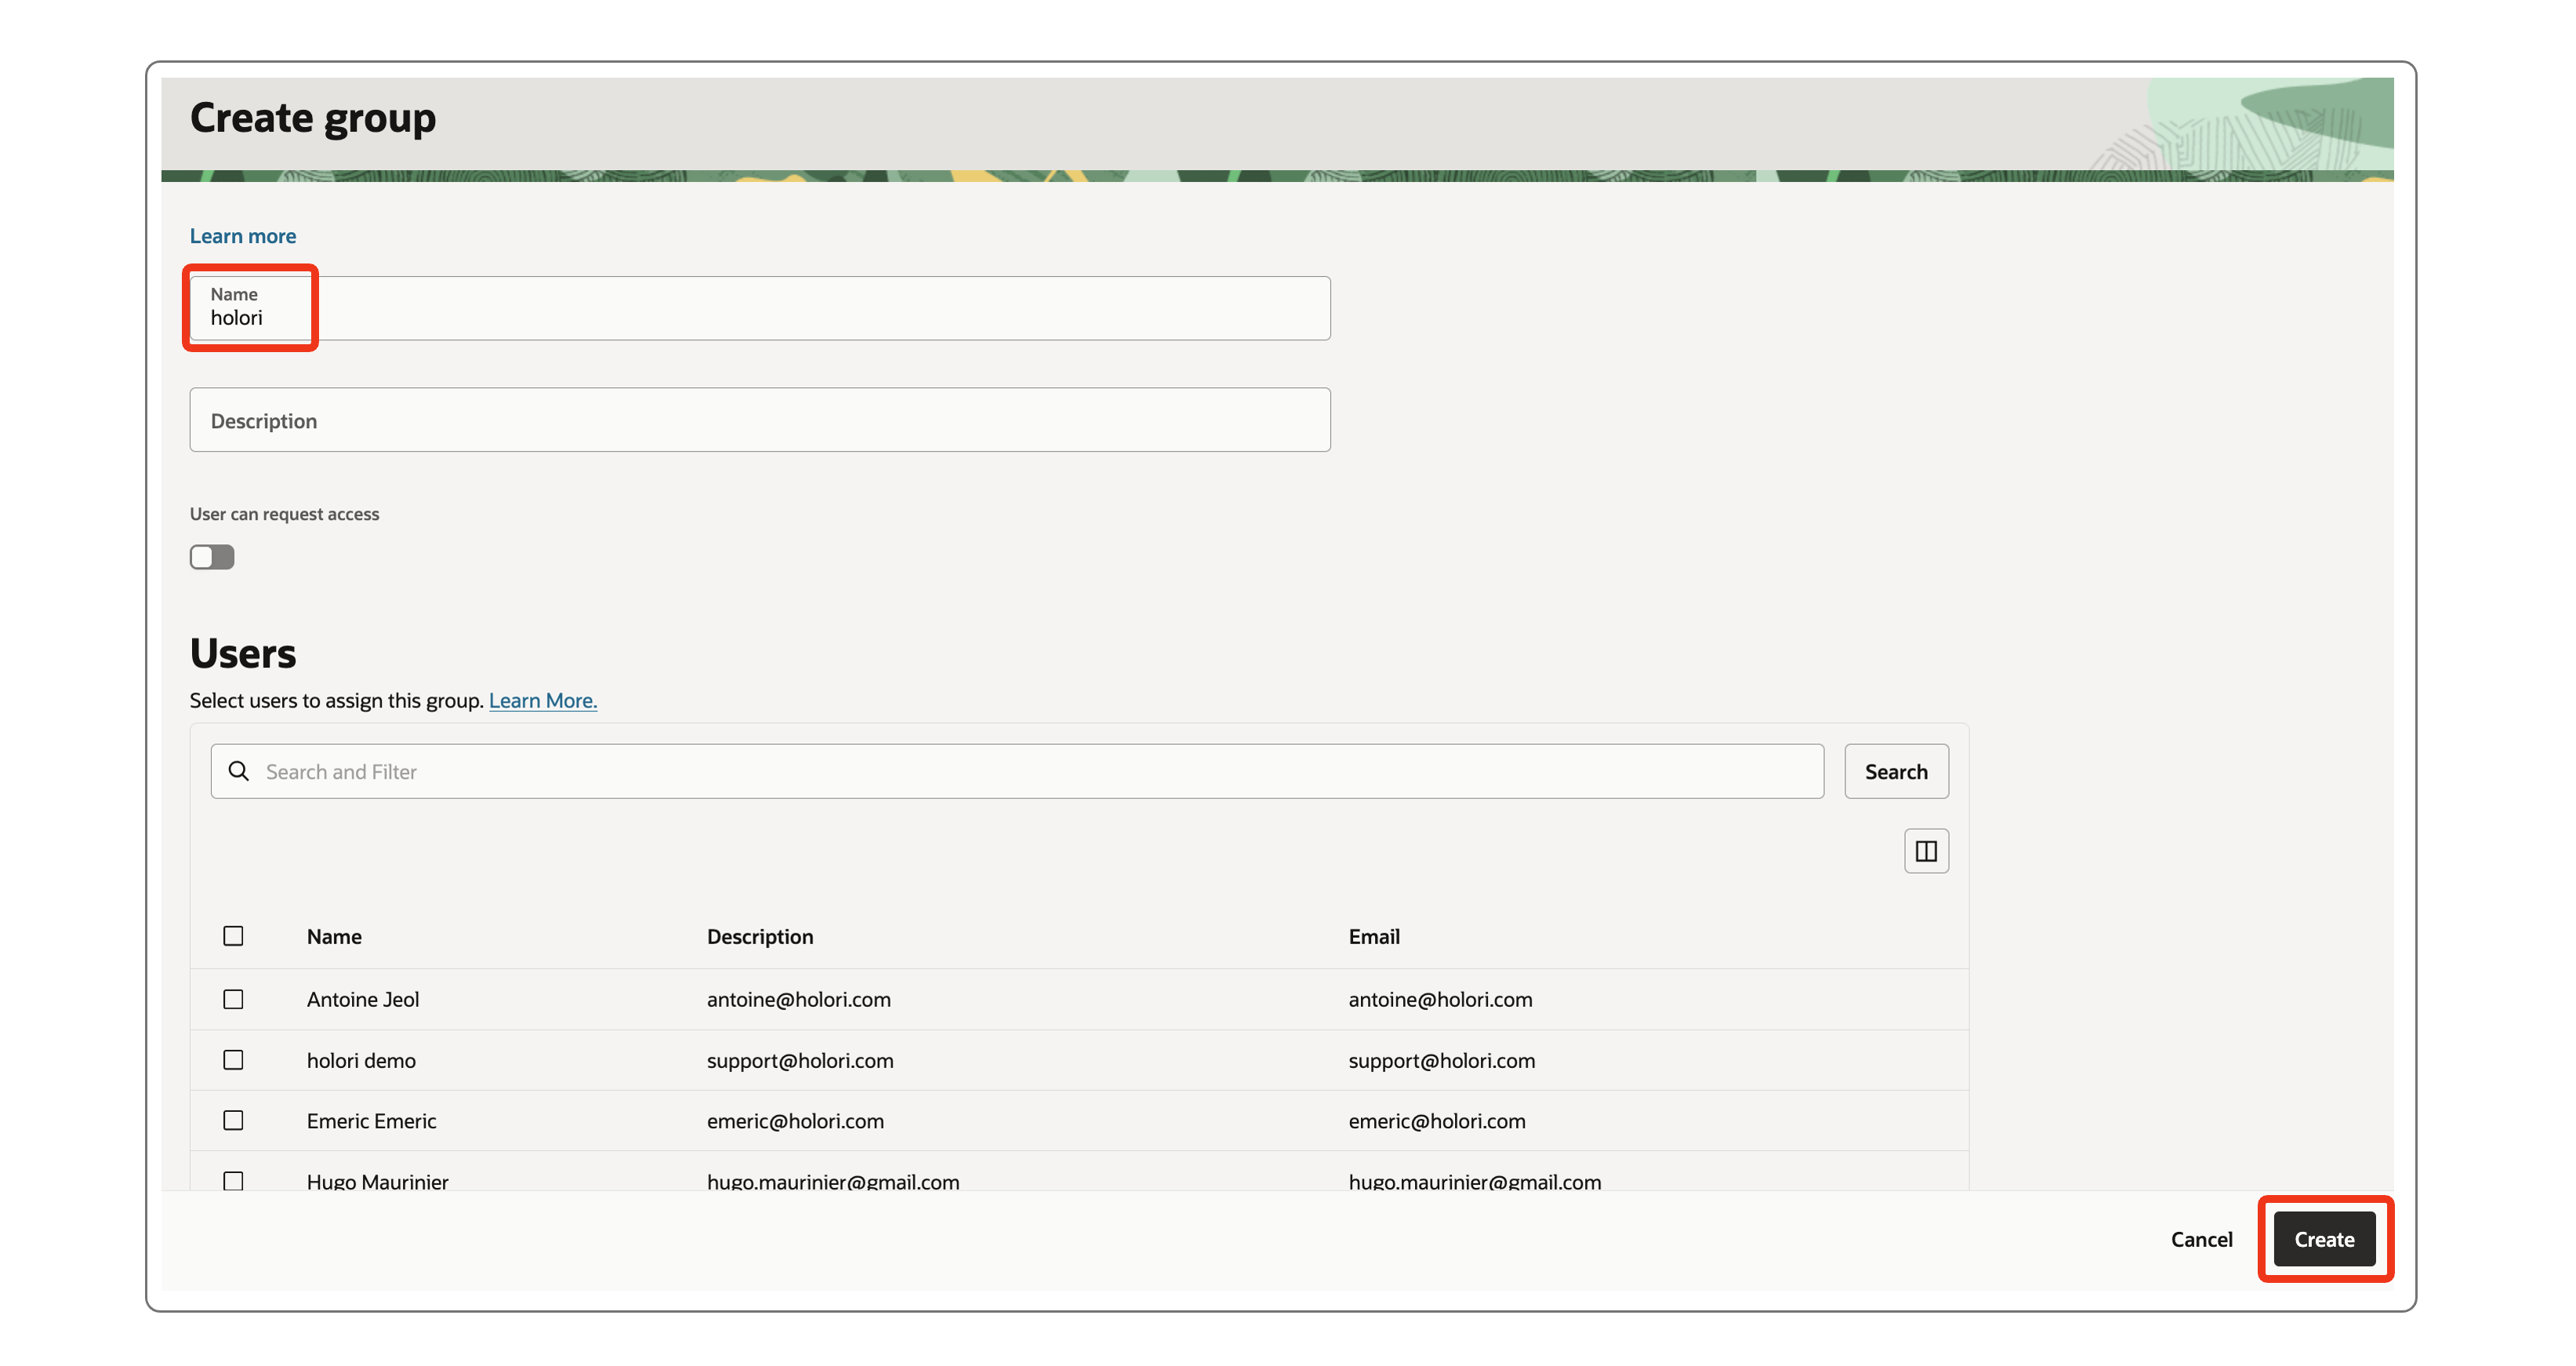
- Give your new group the name holori
- Click on the Create button at the bottom of the page
Step 4: Create a dedicated user and attach it to the created group
- Navigate to: https://cloud.oracle.com/identity/domains
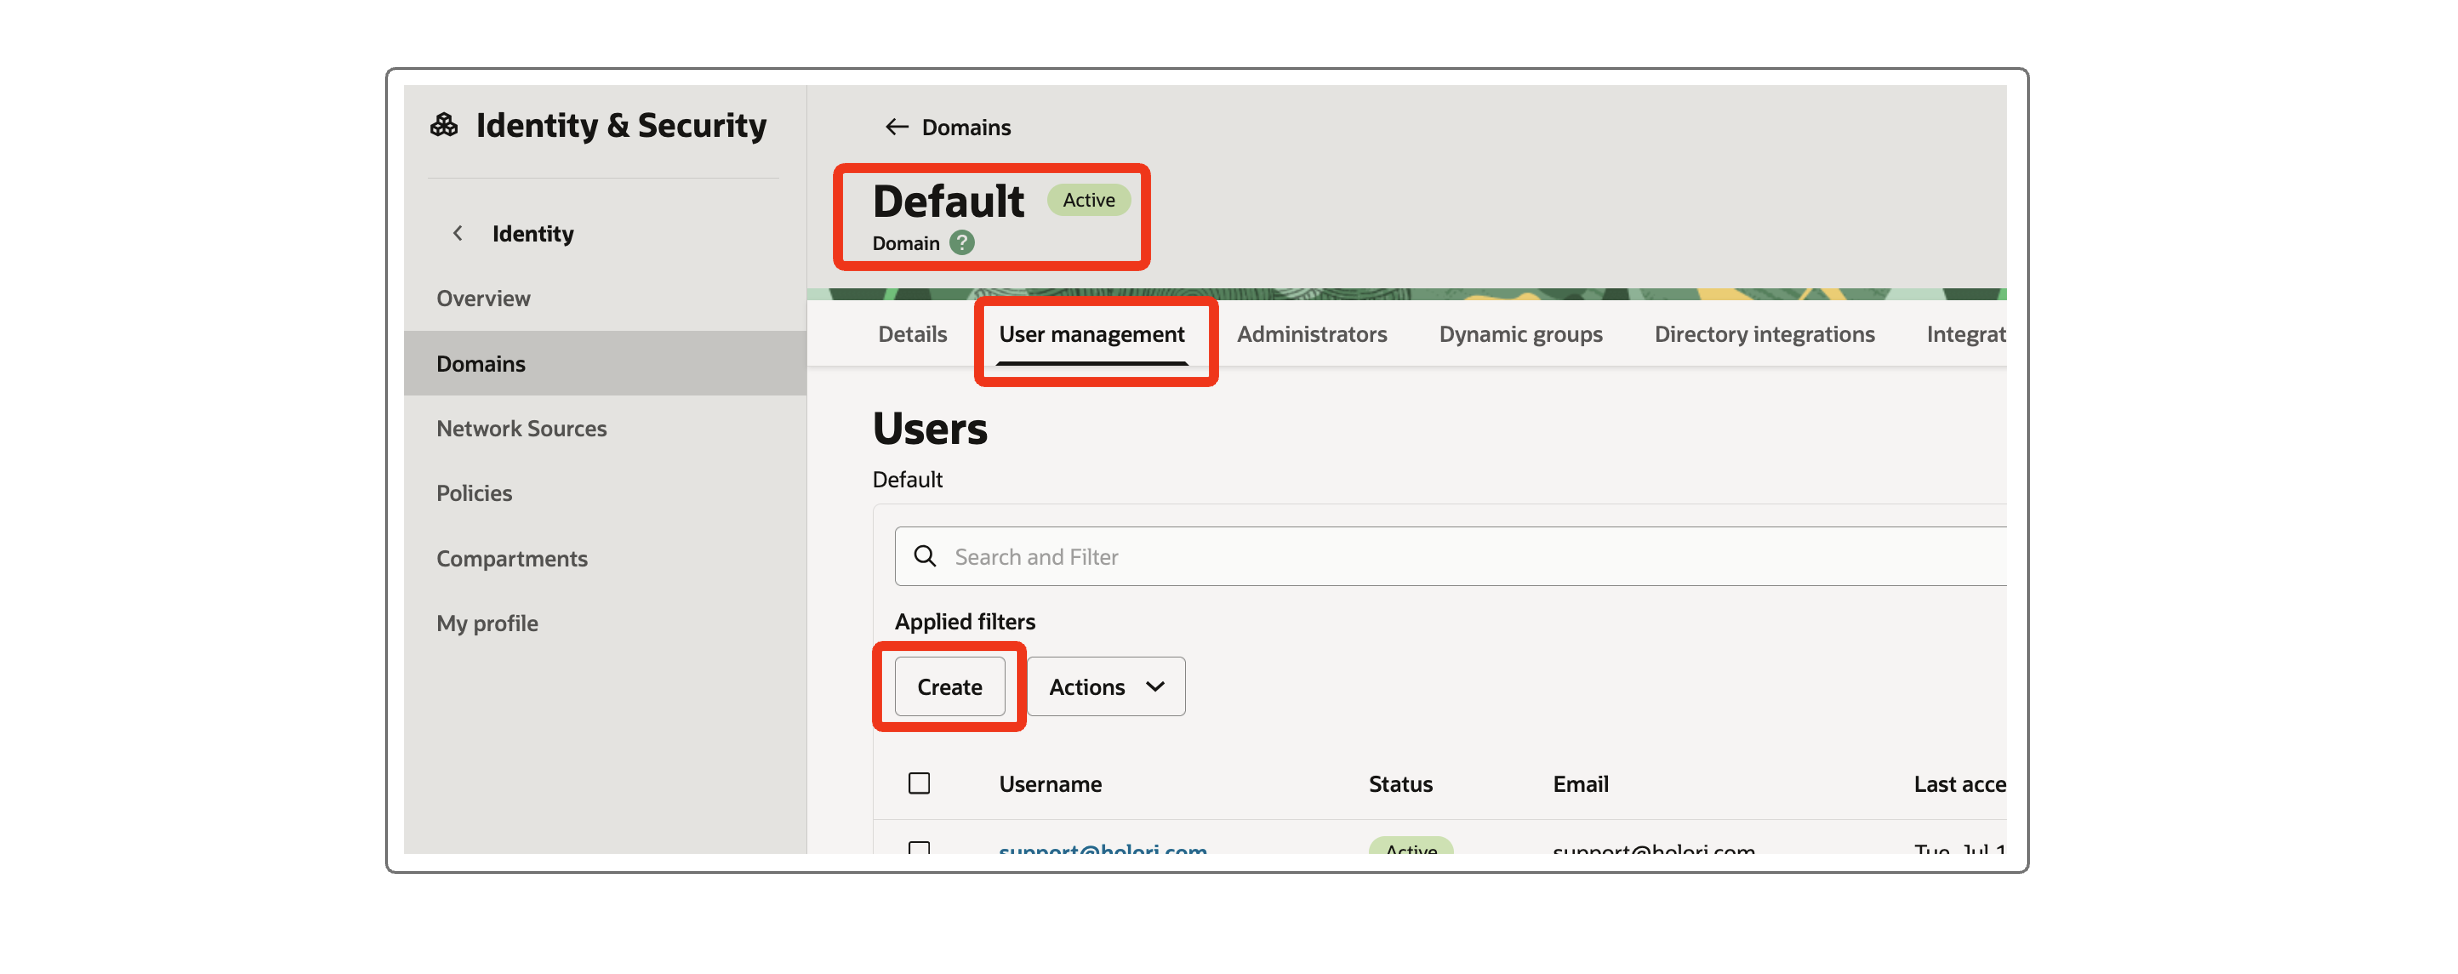
- Click on the Default domain
- Open the User management tab
- In the Users section, click on Create
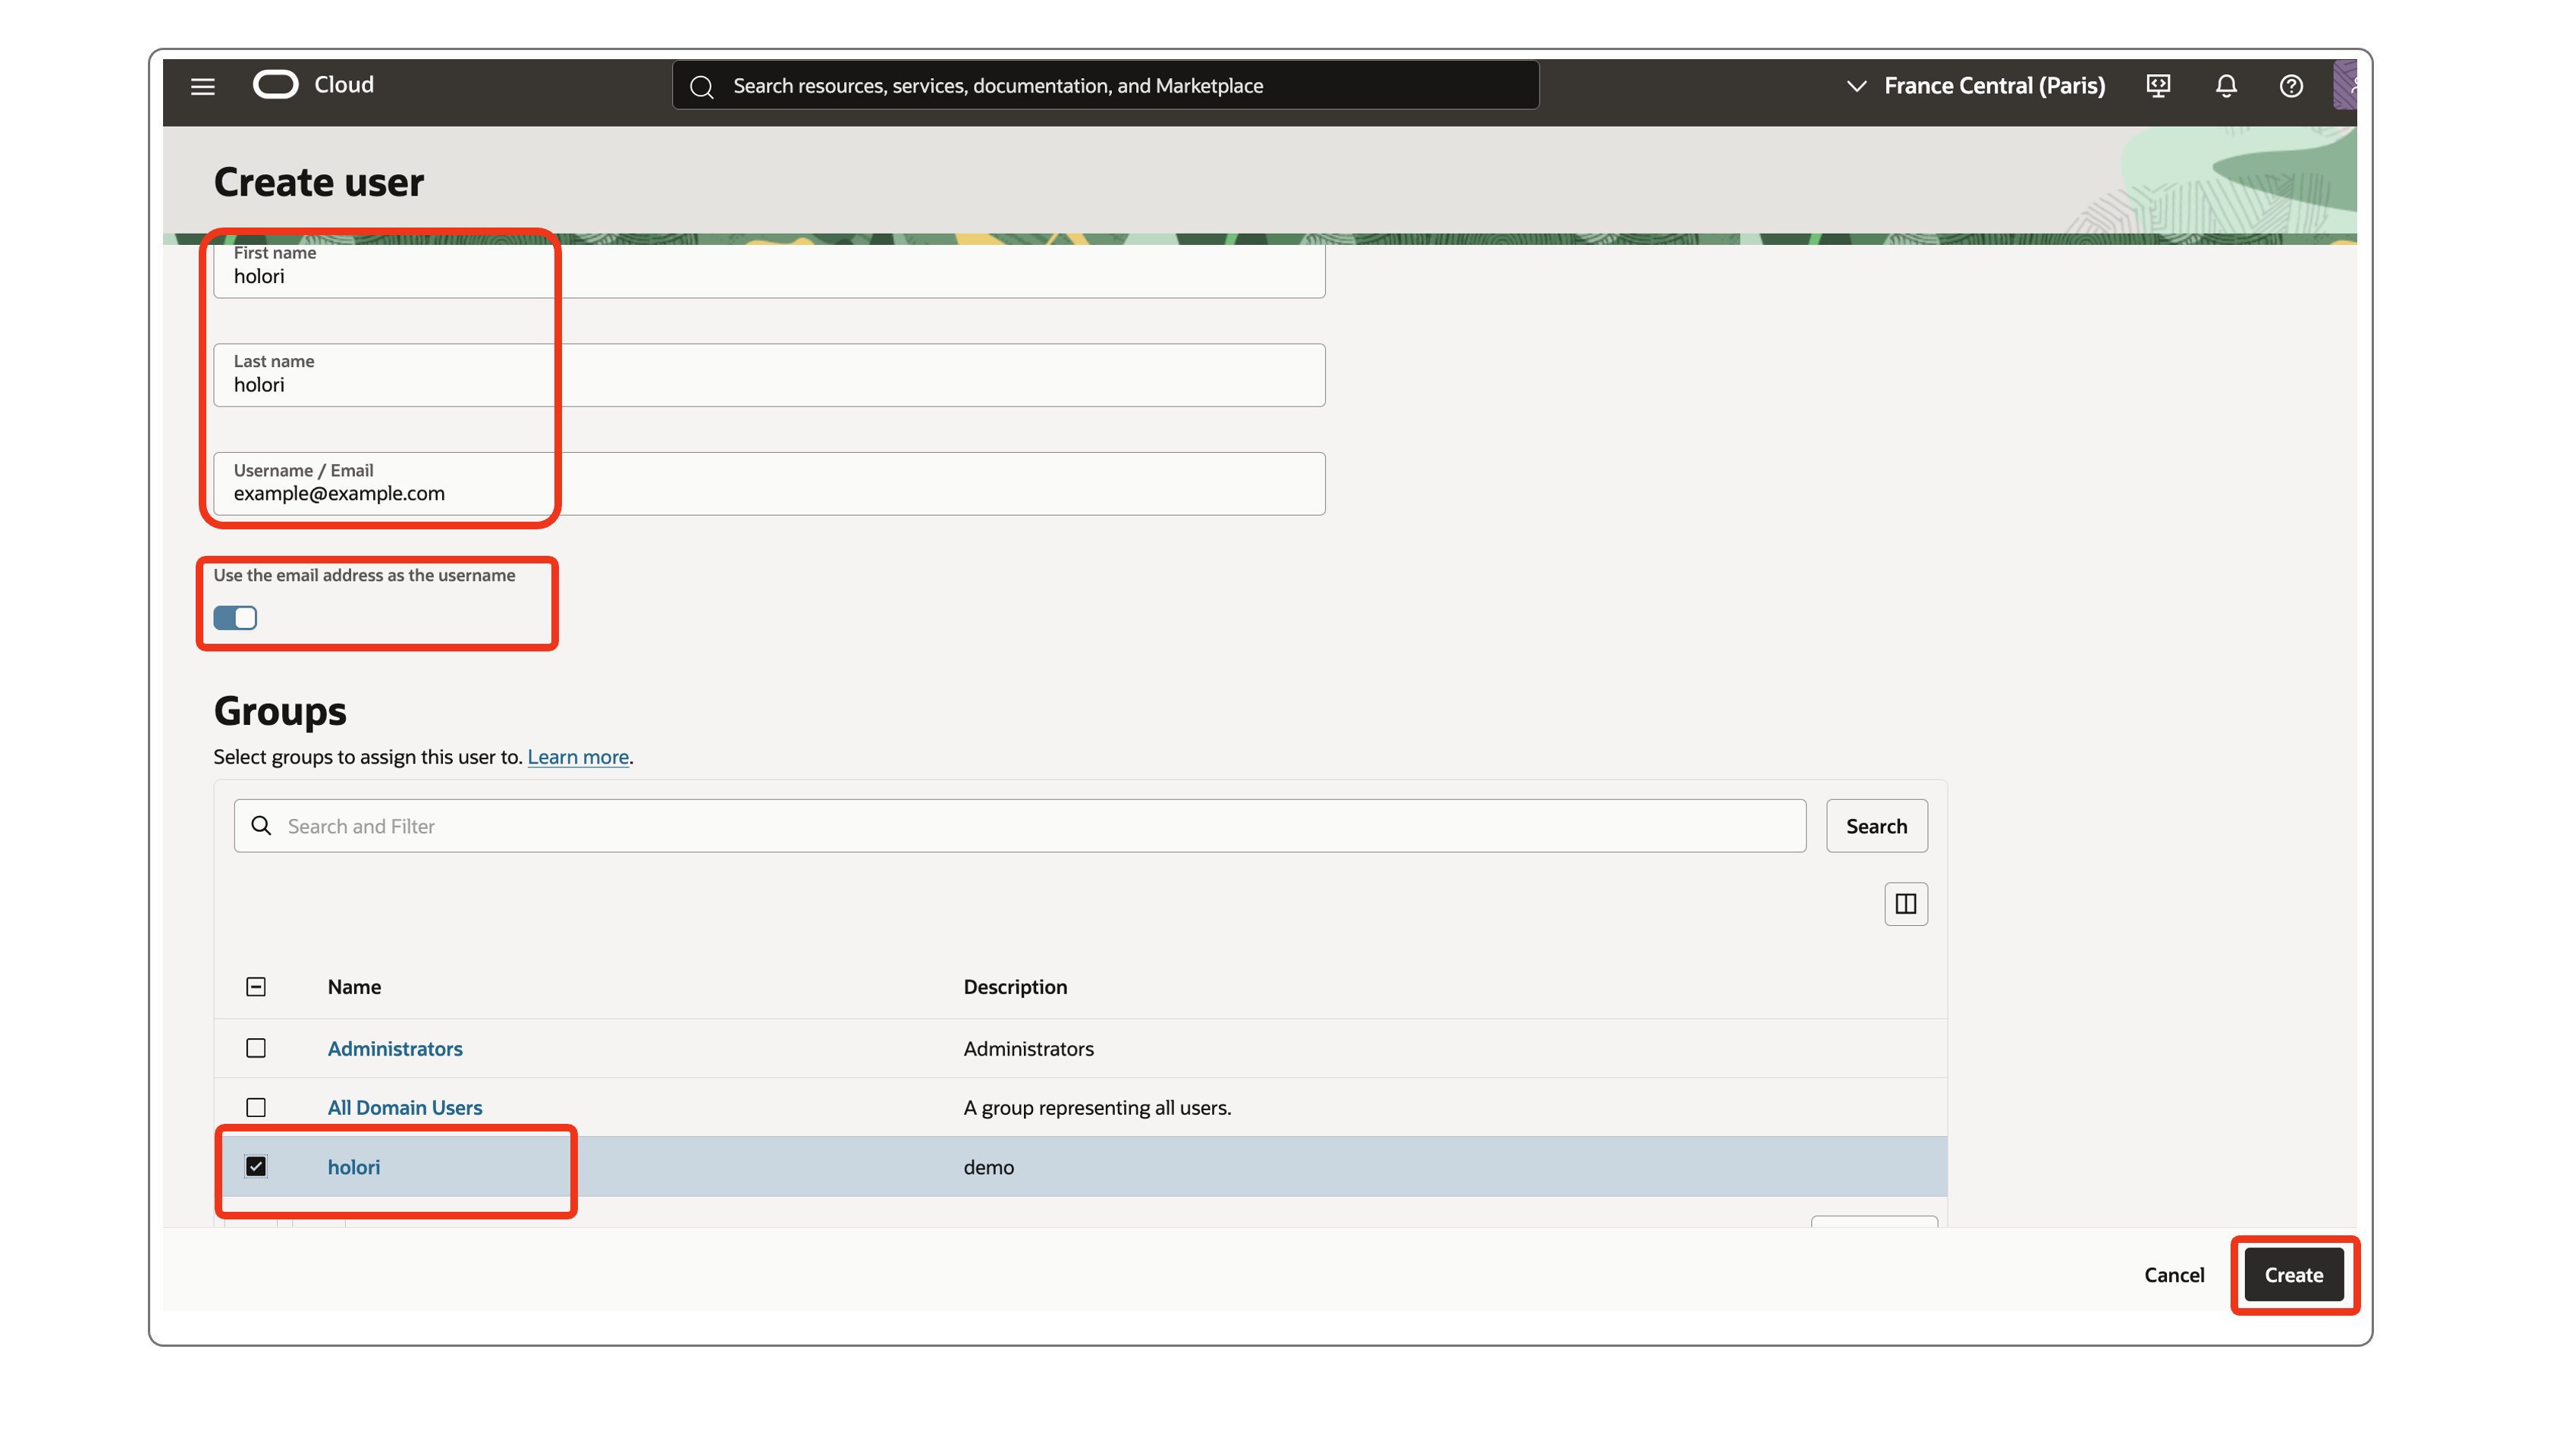
- For the user last name you can, for example, specify holori
- For the email address, use yours or another address of your choice
- Ensure the checkbox Use the email address as the username is enabled
- In the Groups section, select the holori group you previously created
- Click on the Create button at the bottom of the page
- You are redirected to the created user details page
Step 5: Create a customer secret key
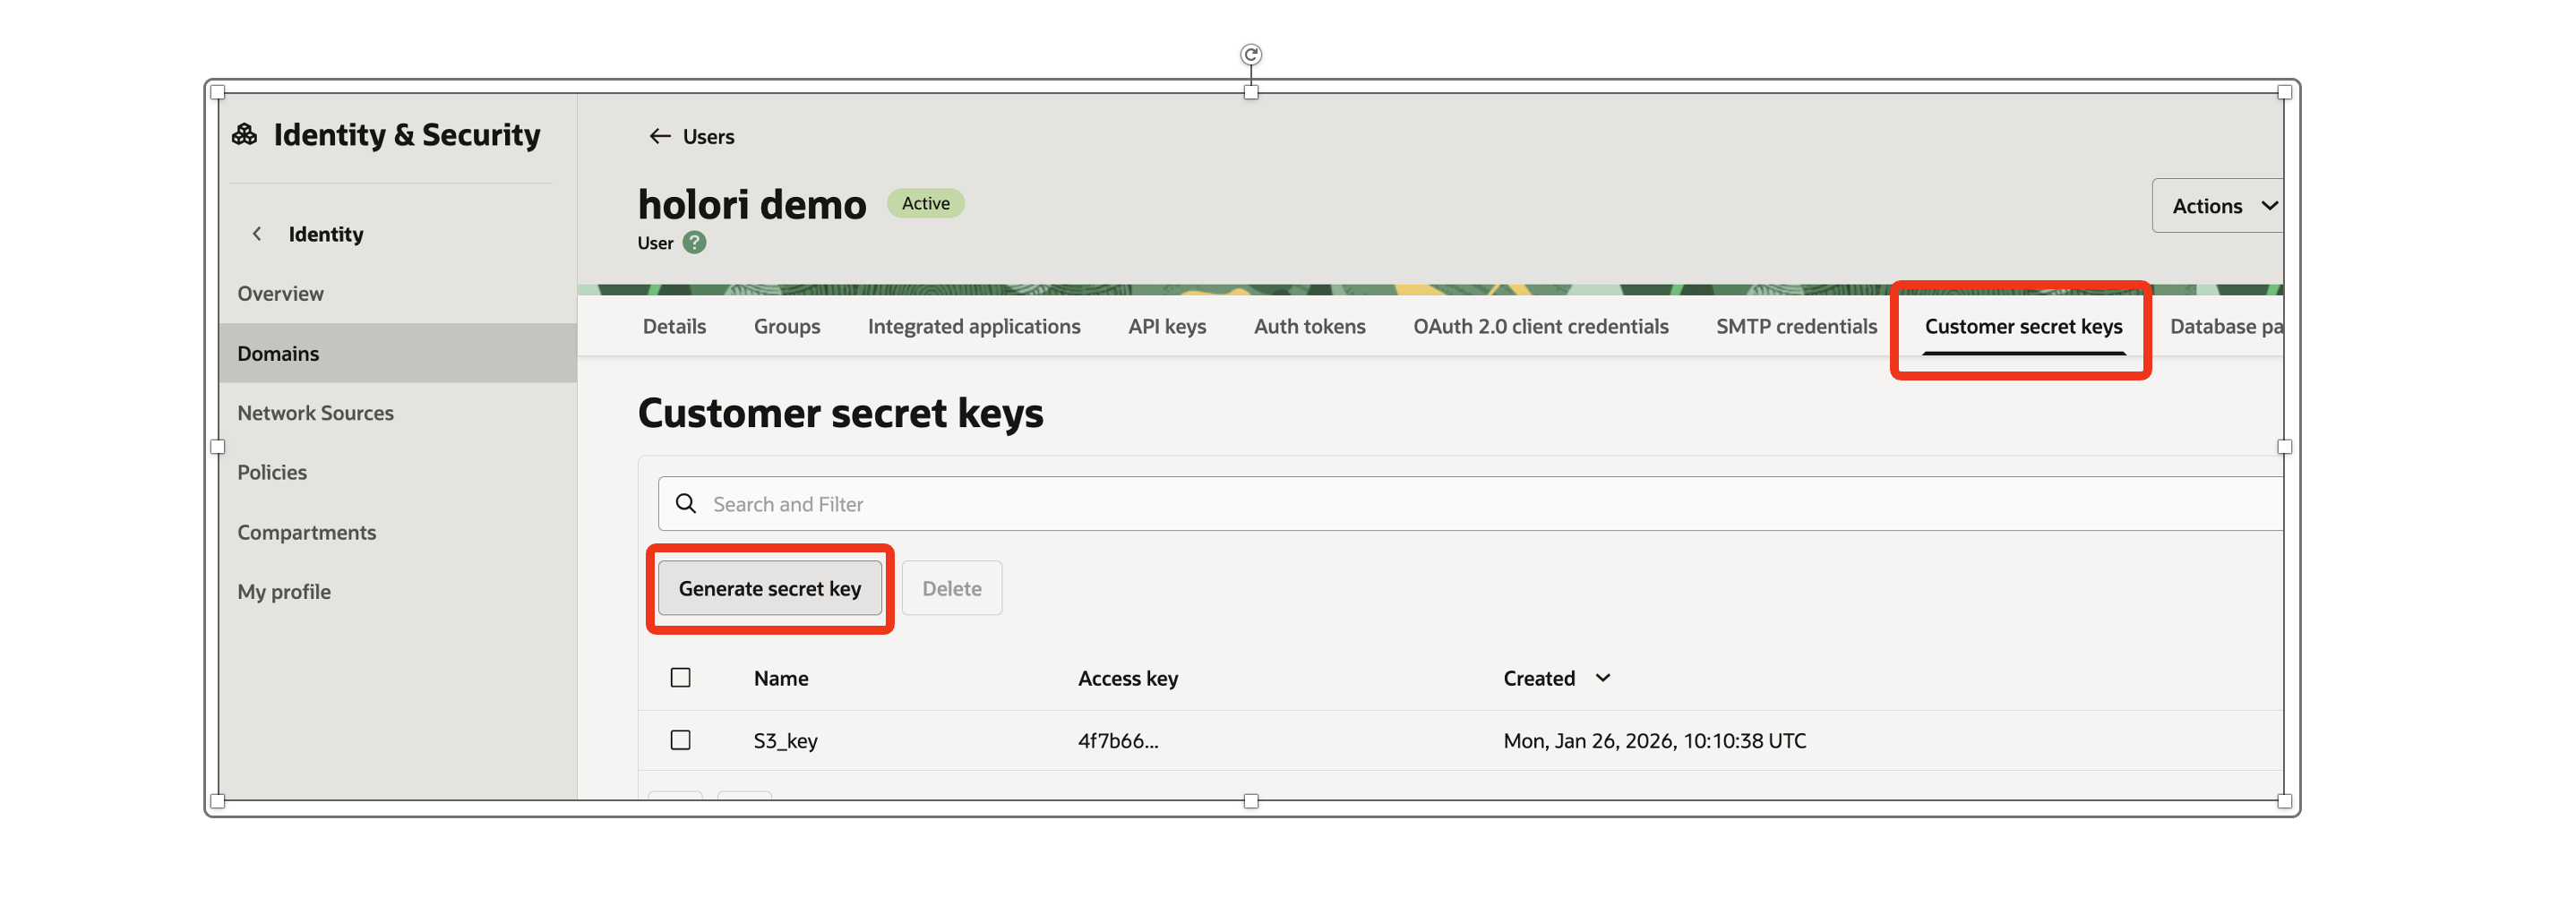
Remain on the created user management page.
- Open the Customer secret keys tab
- Click on the Generate secret key button
- For the name you can, for example, specify holori_bucket_access
- Click on the Generate secret key button at the bottom of the page
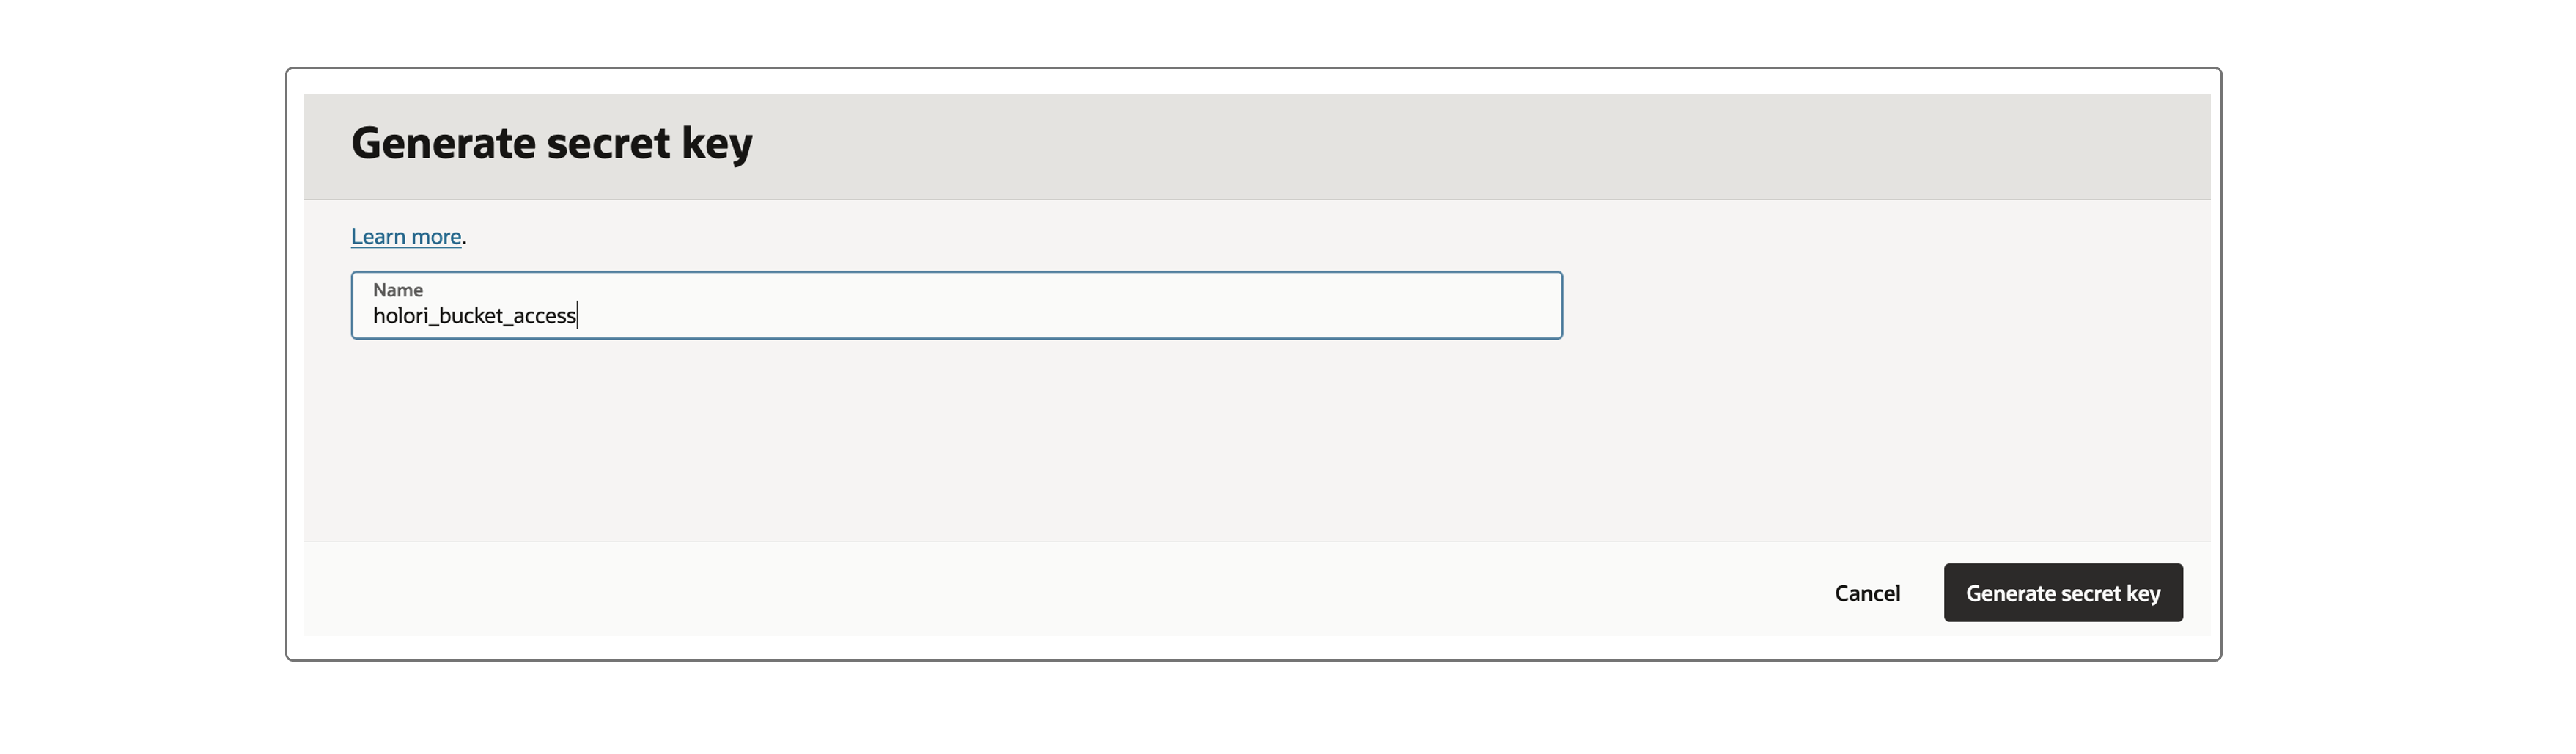
- Copy the Secret key into the corresponding field on Holori App
- Click on the Close button at the bottom of the page
- Select the created access key and click on its action menu at the far right of the line
- Click on the Copy access key entry
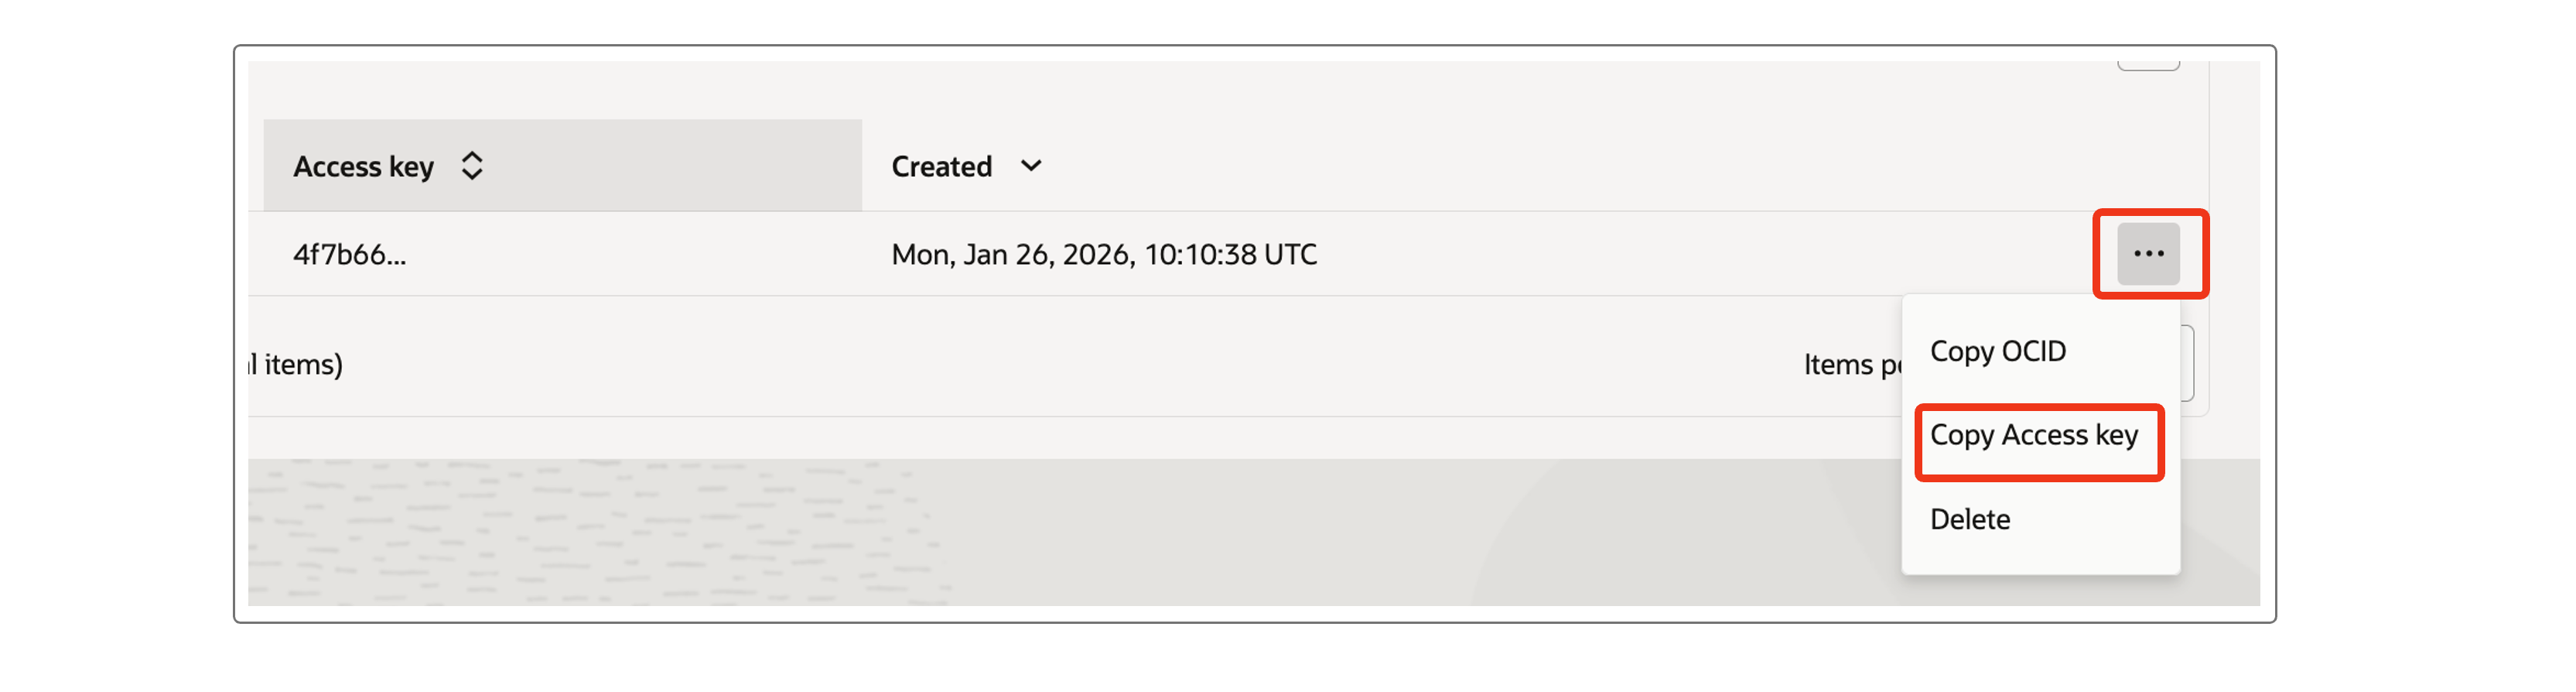
- Copy the Access key into the corresponding field on Holori App
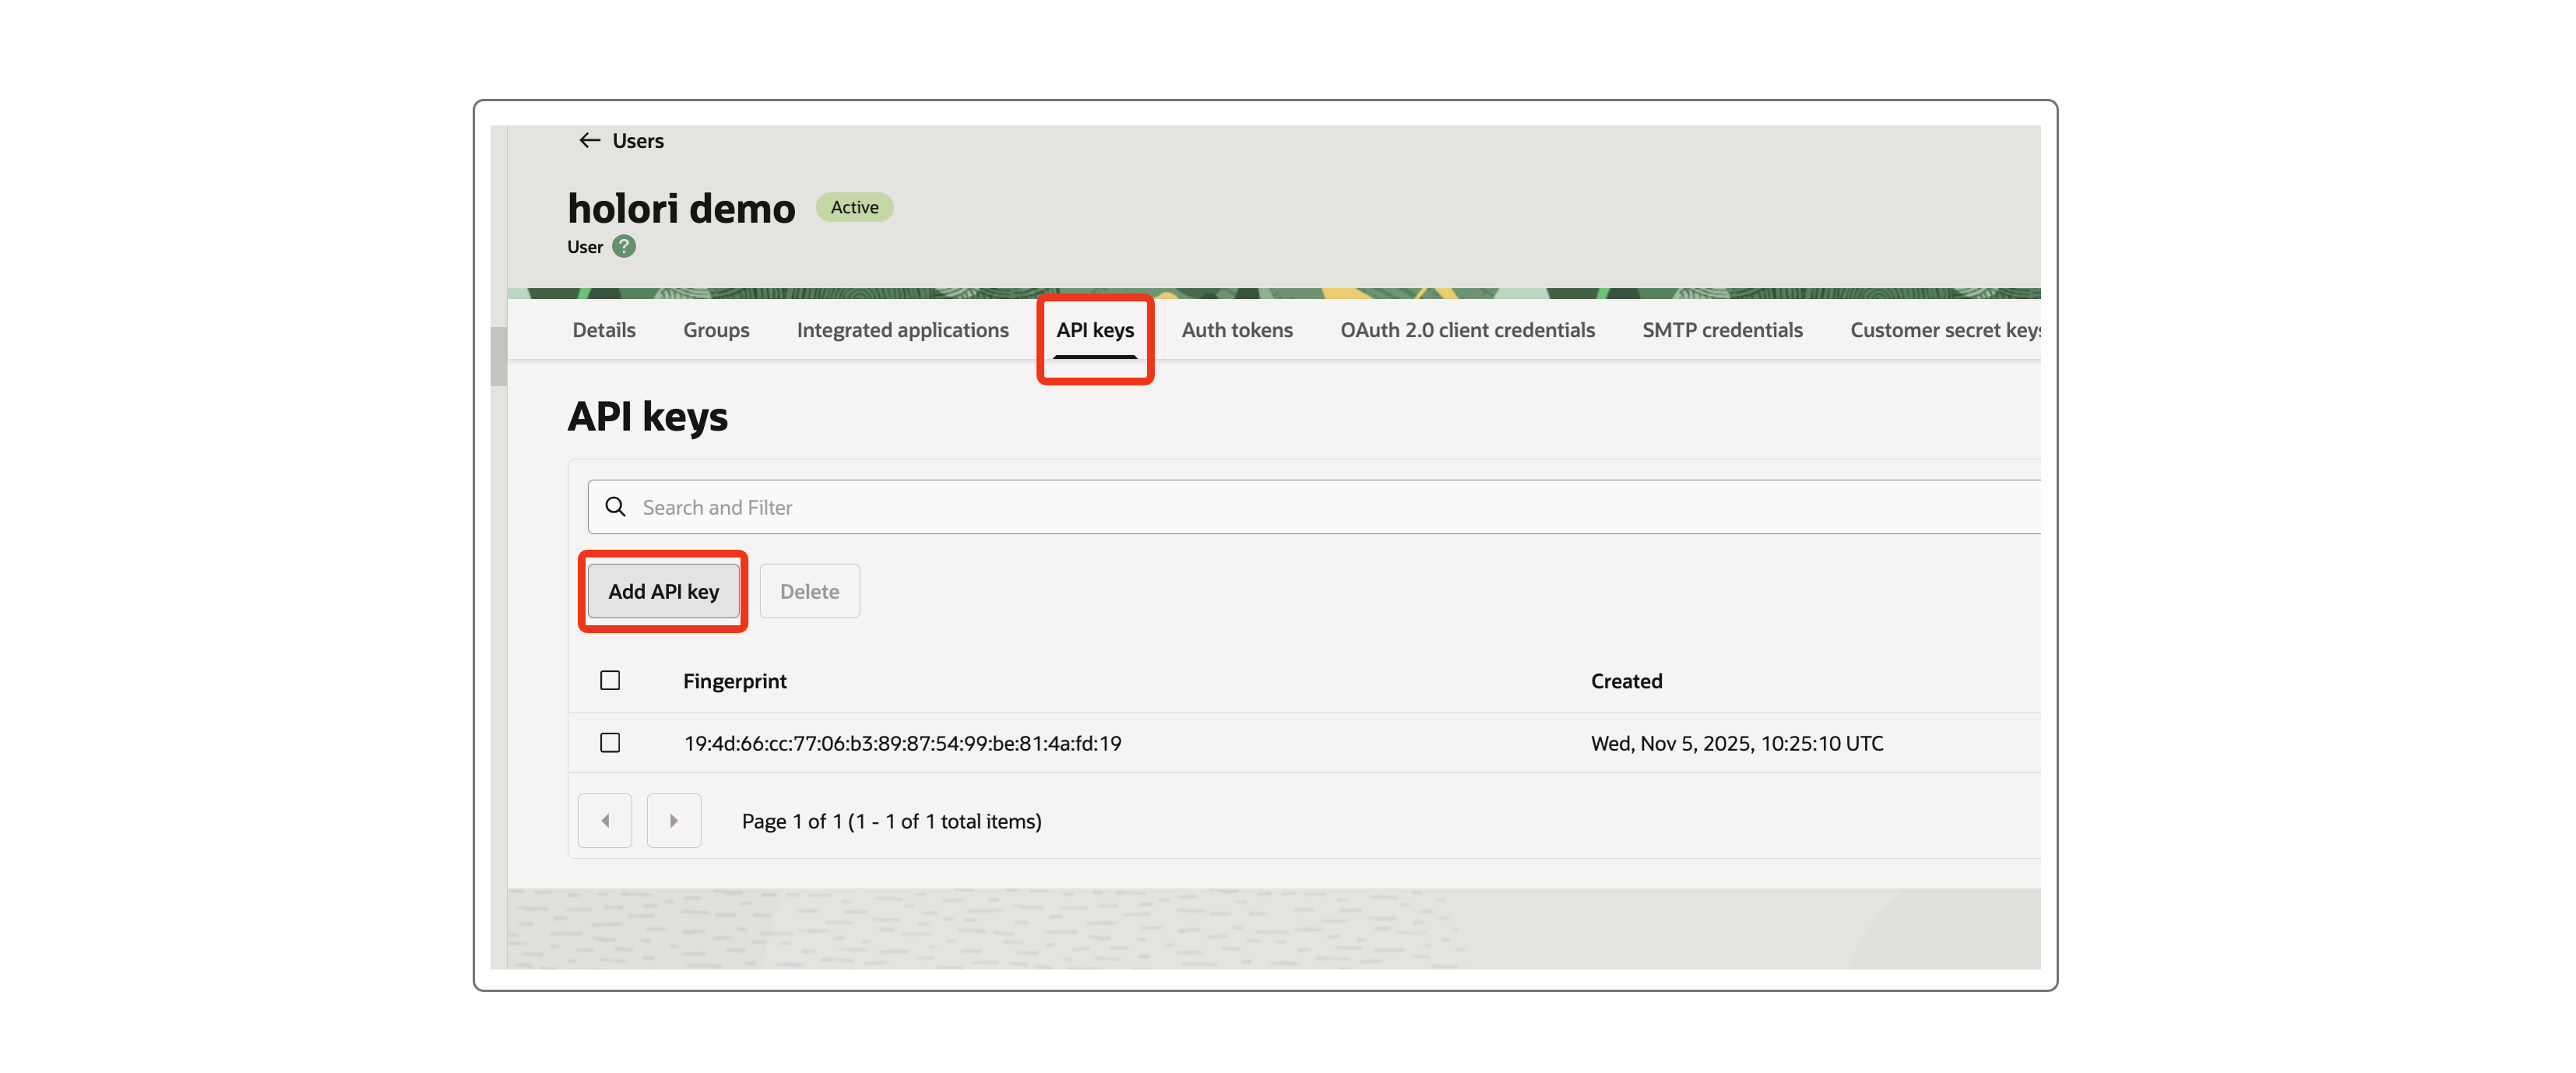
Step 6: Add an API key
Remain on the created user management page.
- Open the API Keys tab
- Click on the Add API key button
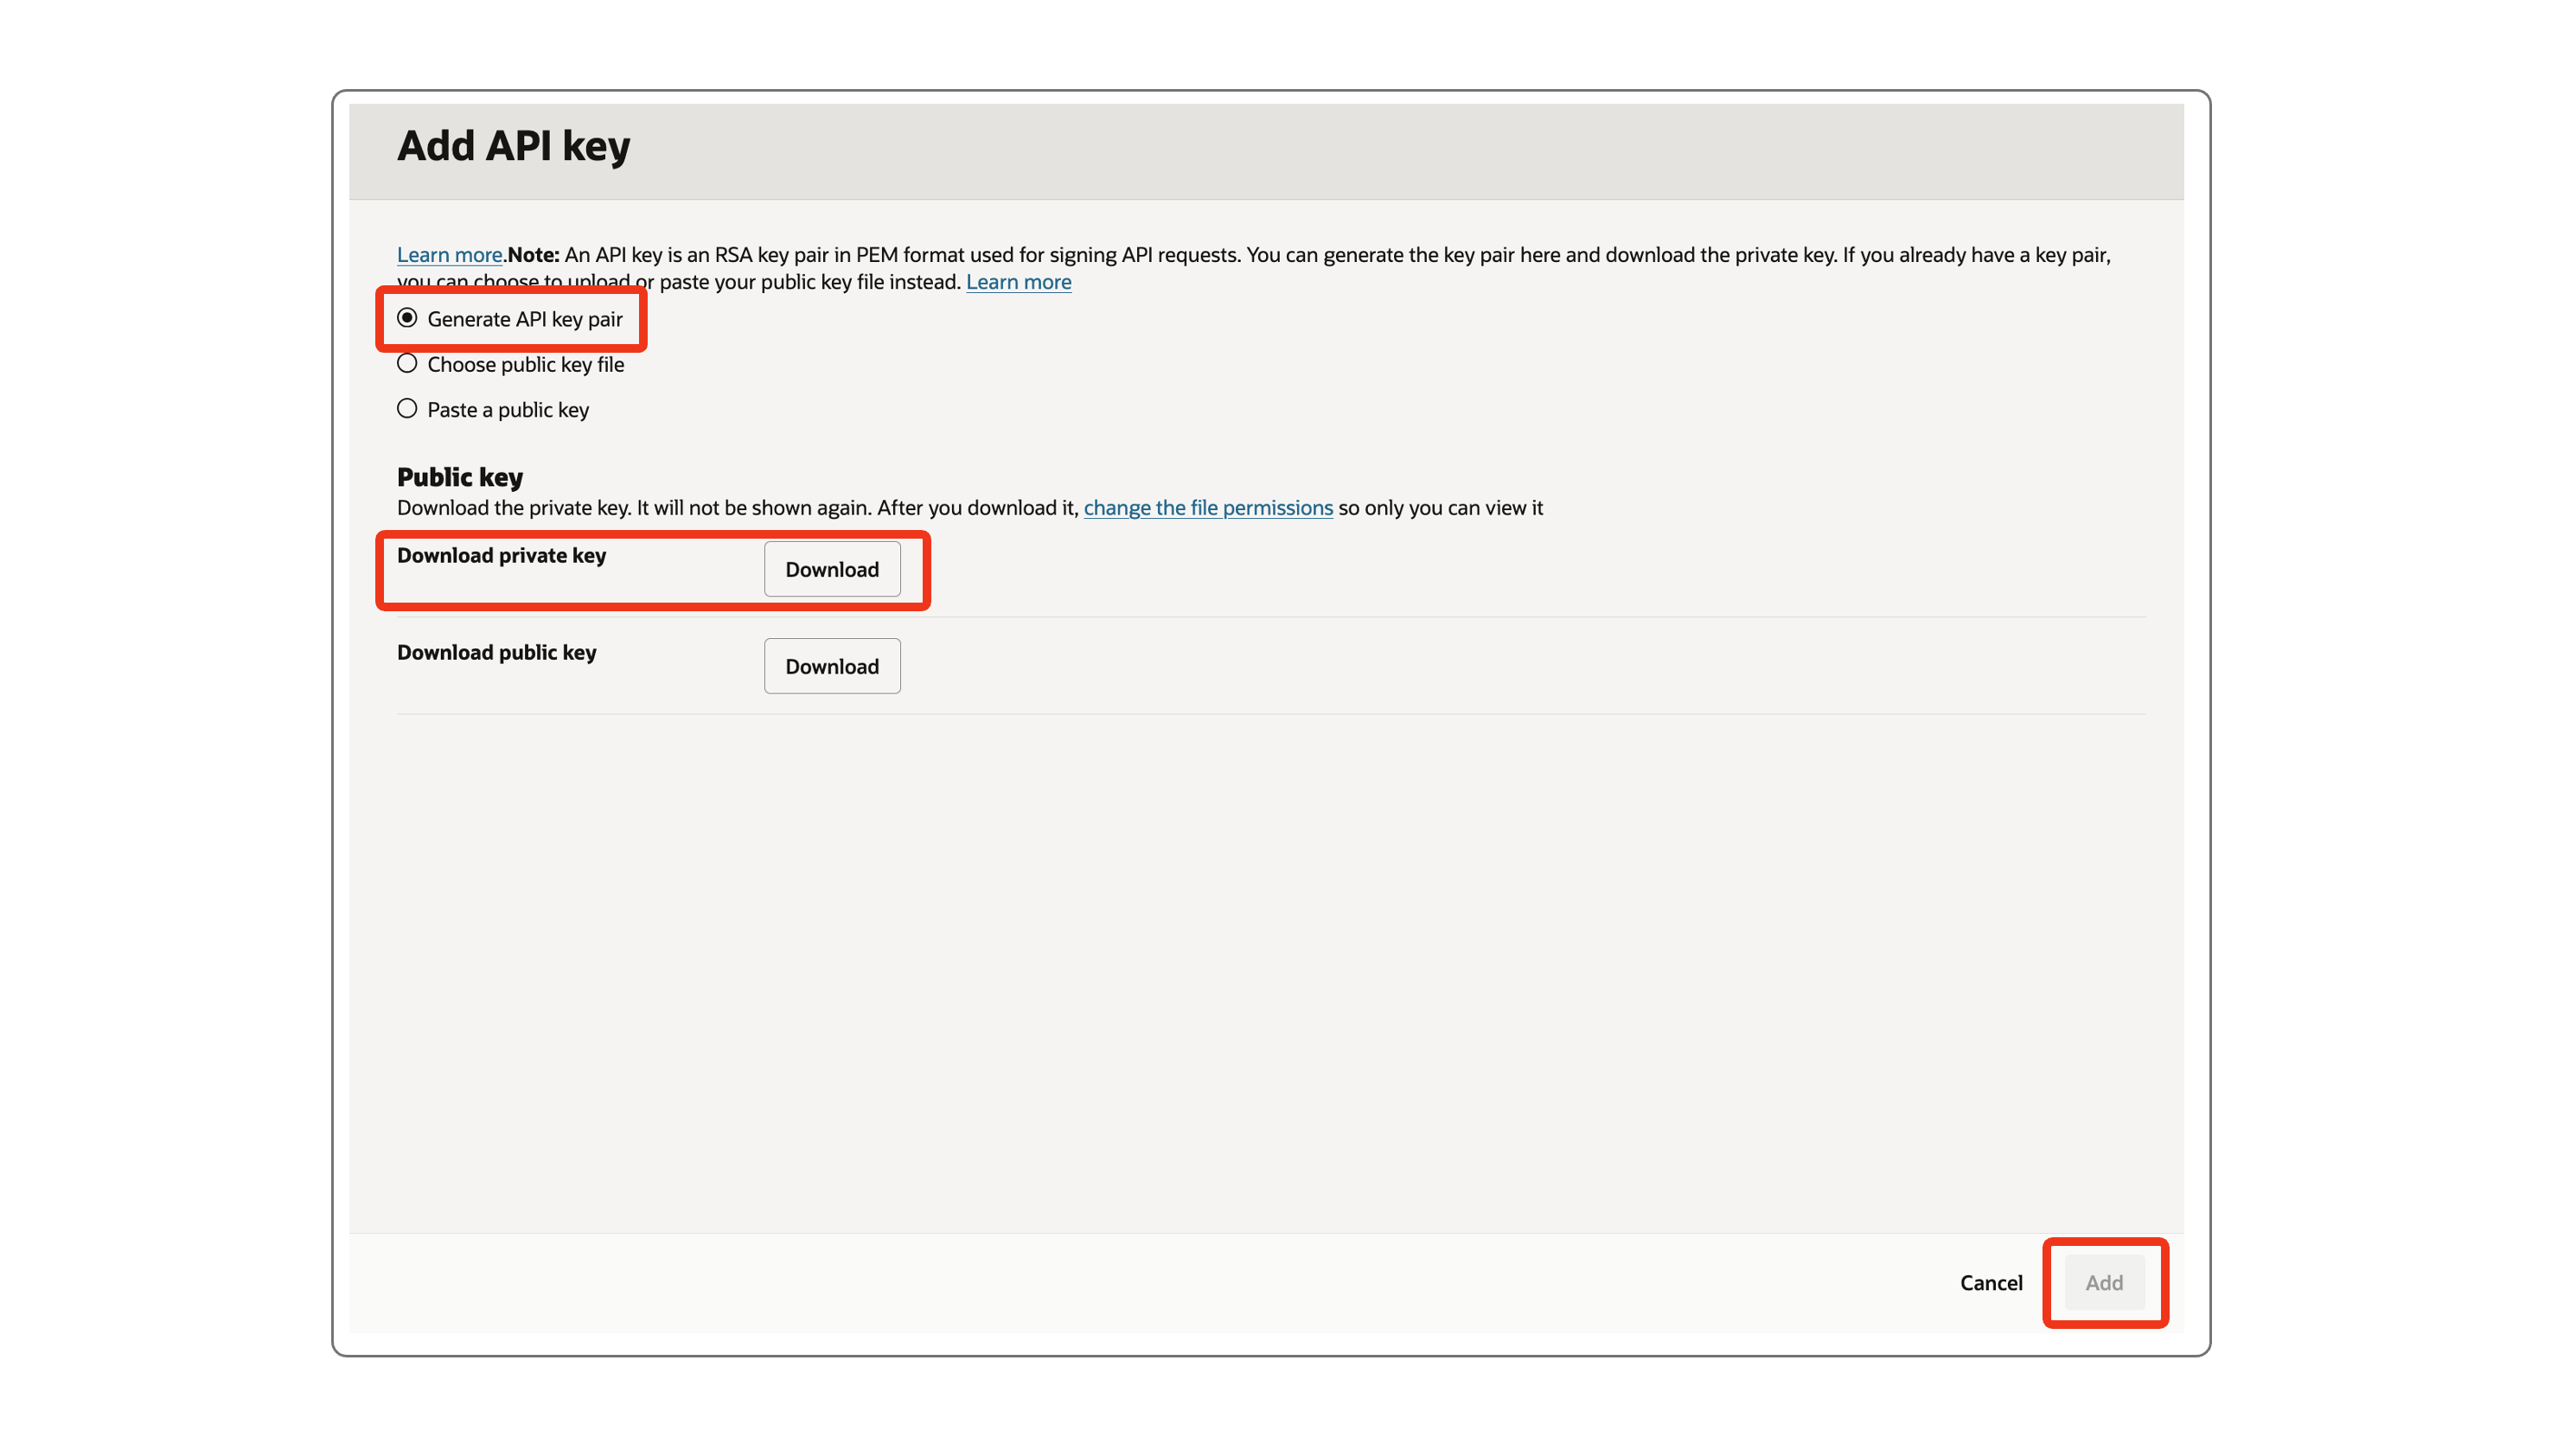
- Select the Generate API key pair entry
- Download the Private Key and upload it on the corresponding field on Holori app.
- Click on the Add button at the bottom of the page
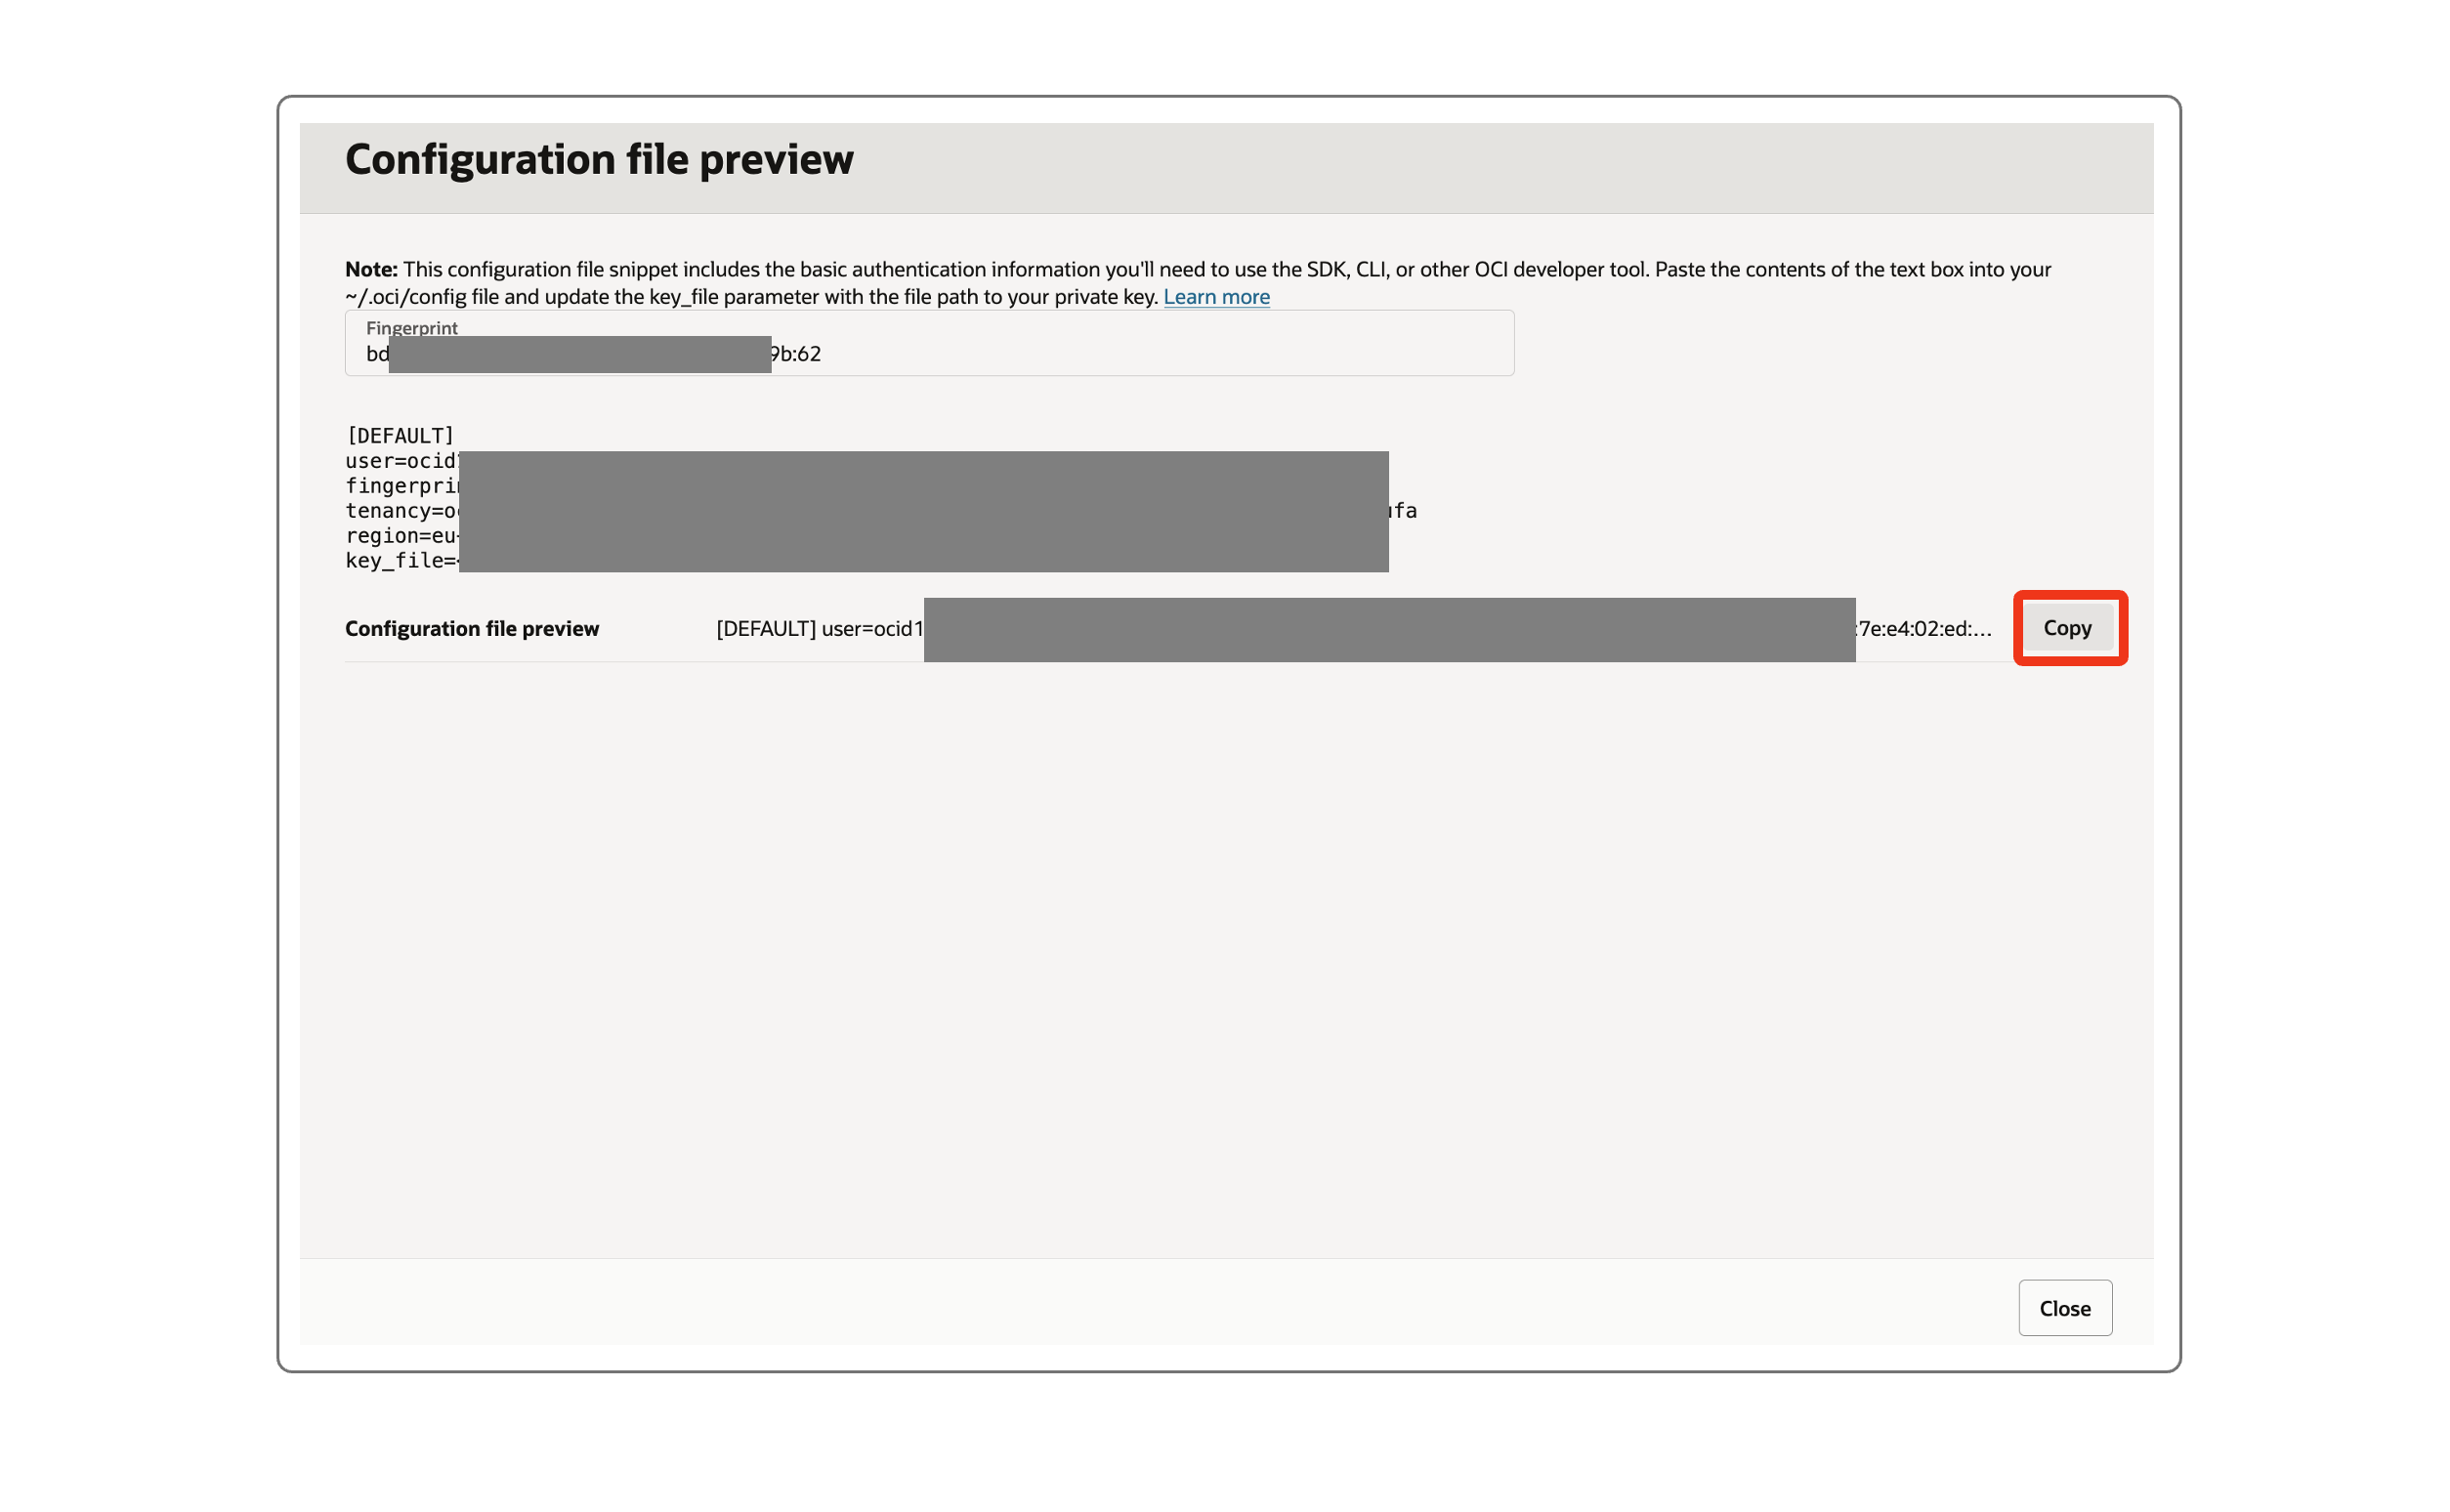
- Copy the Configuration file by clicking the Copy button
- Upload your configuration file to Holori App
- Click on the Close button at the bottom of the page
Step 7: Create a bucket
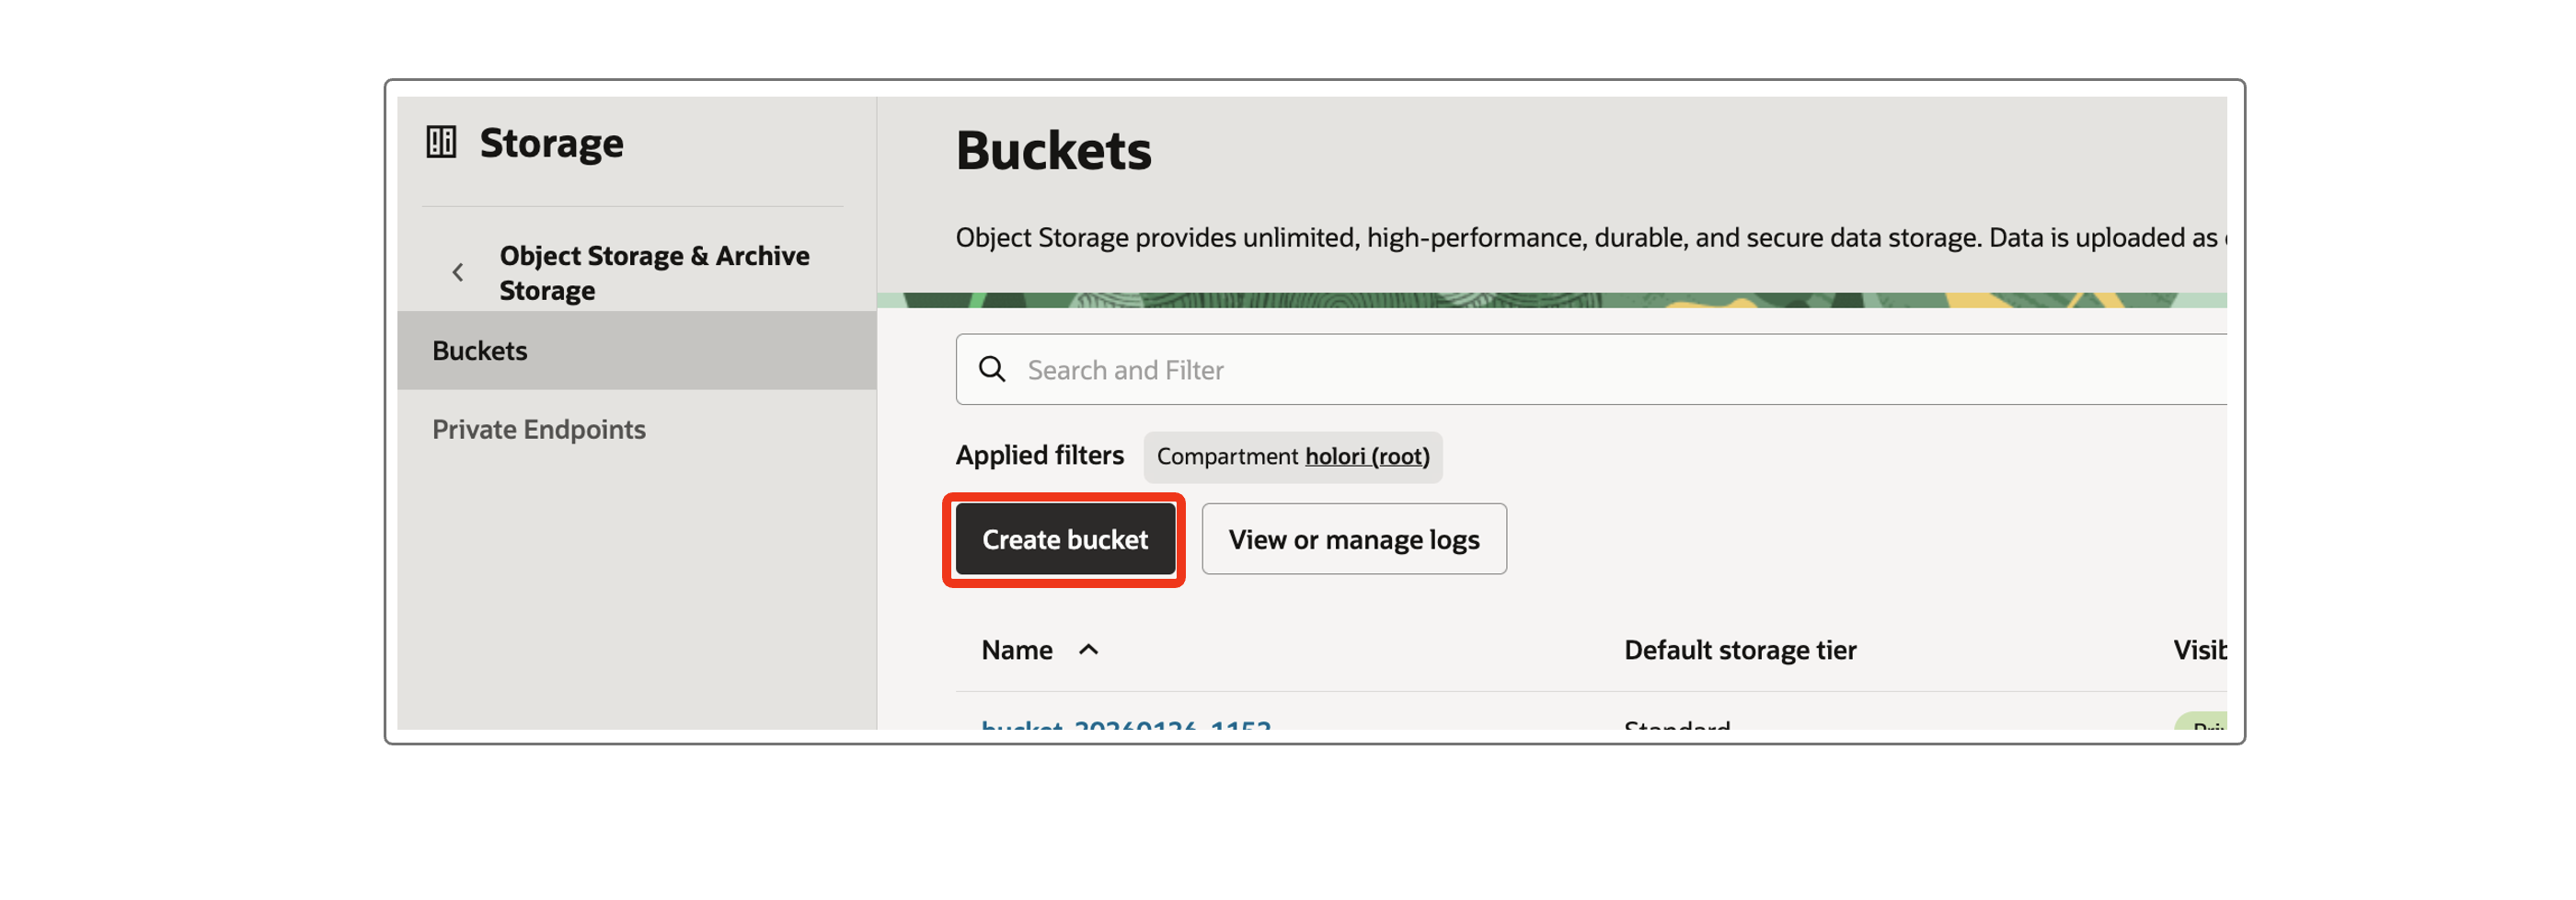
- Navigate to: https://cloud.oracle.com/object-storage/buckets
- Click on the Create bucket button
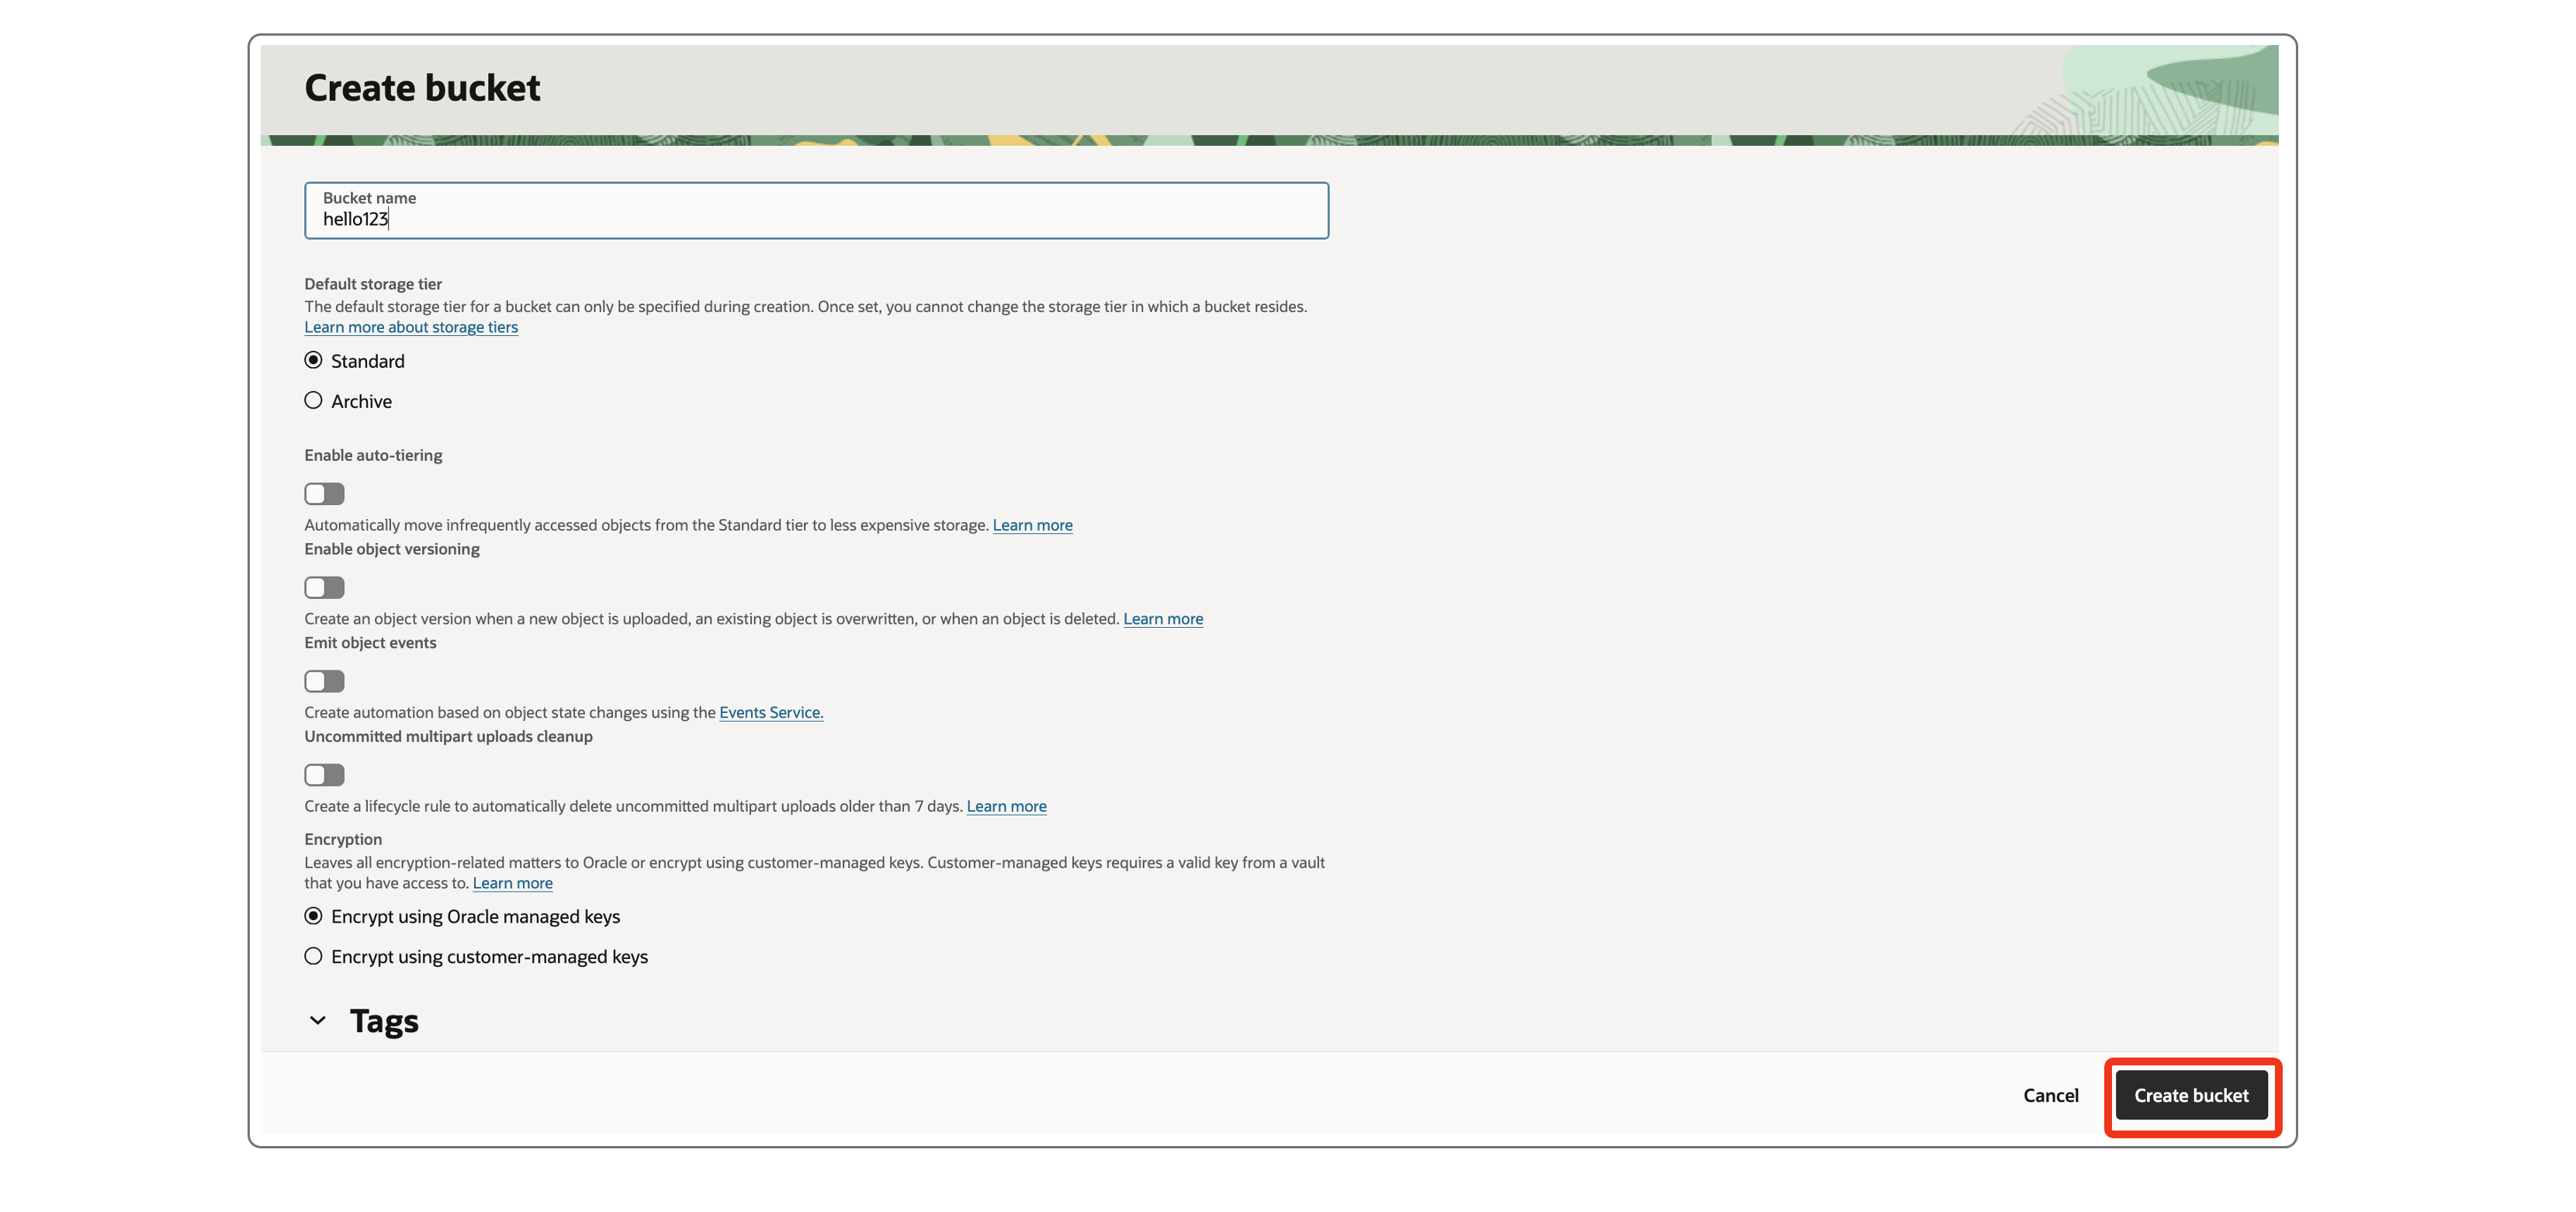
- Give it a name of your choice
- Enter the Bucket name on Holori app
- Click on Create at the bottom of the page
Step 8: Create an access policy
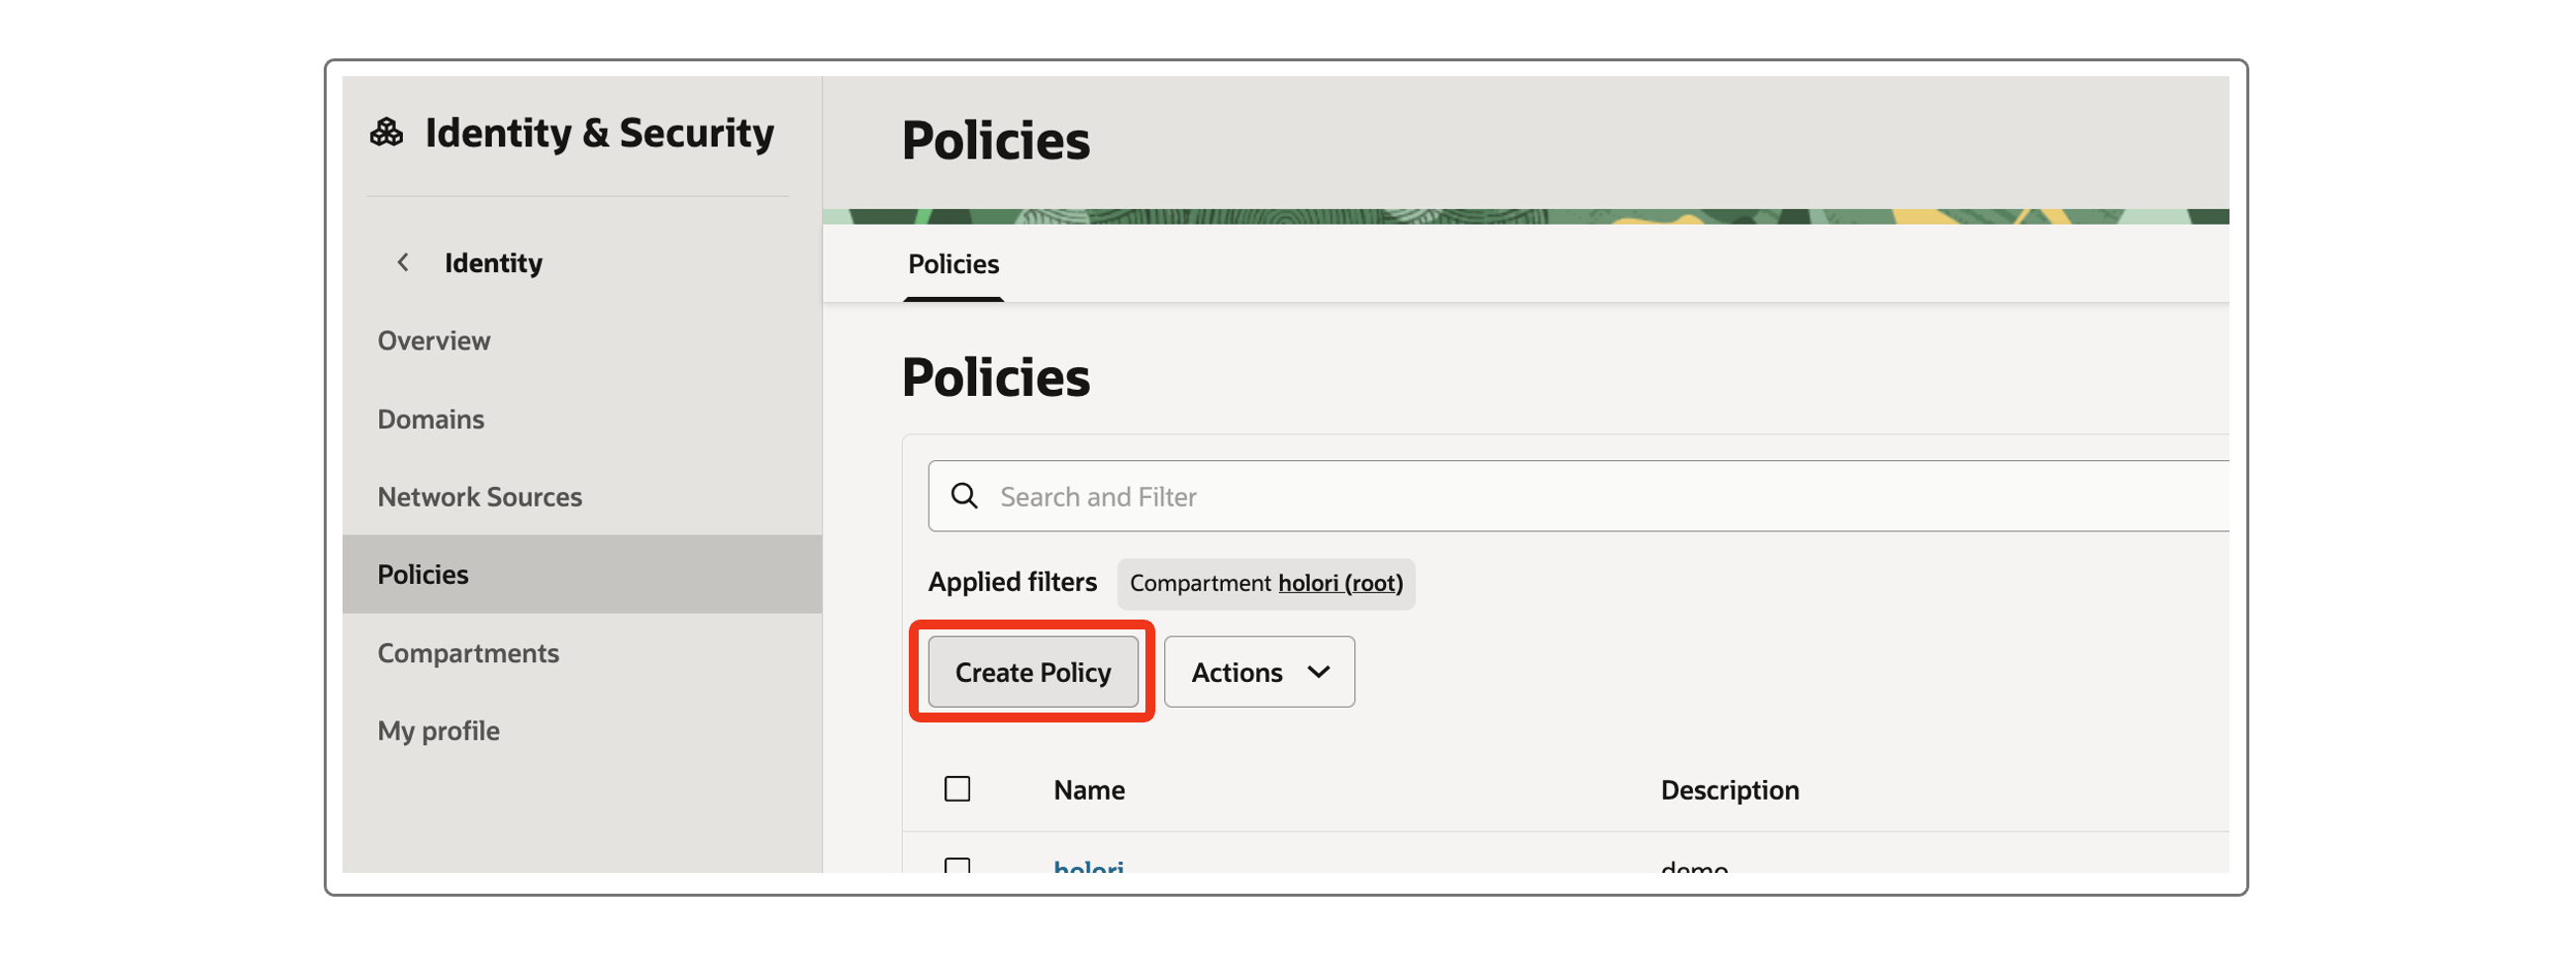
- Navigate to: https://cloud.oracle.com/identity/domains/policies
- Click on the Create policy button
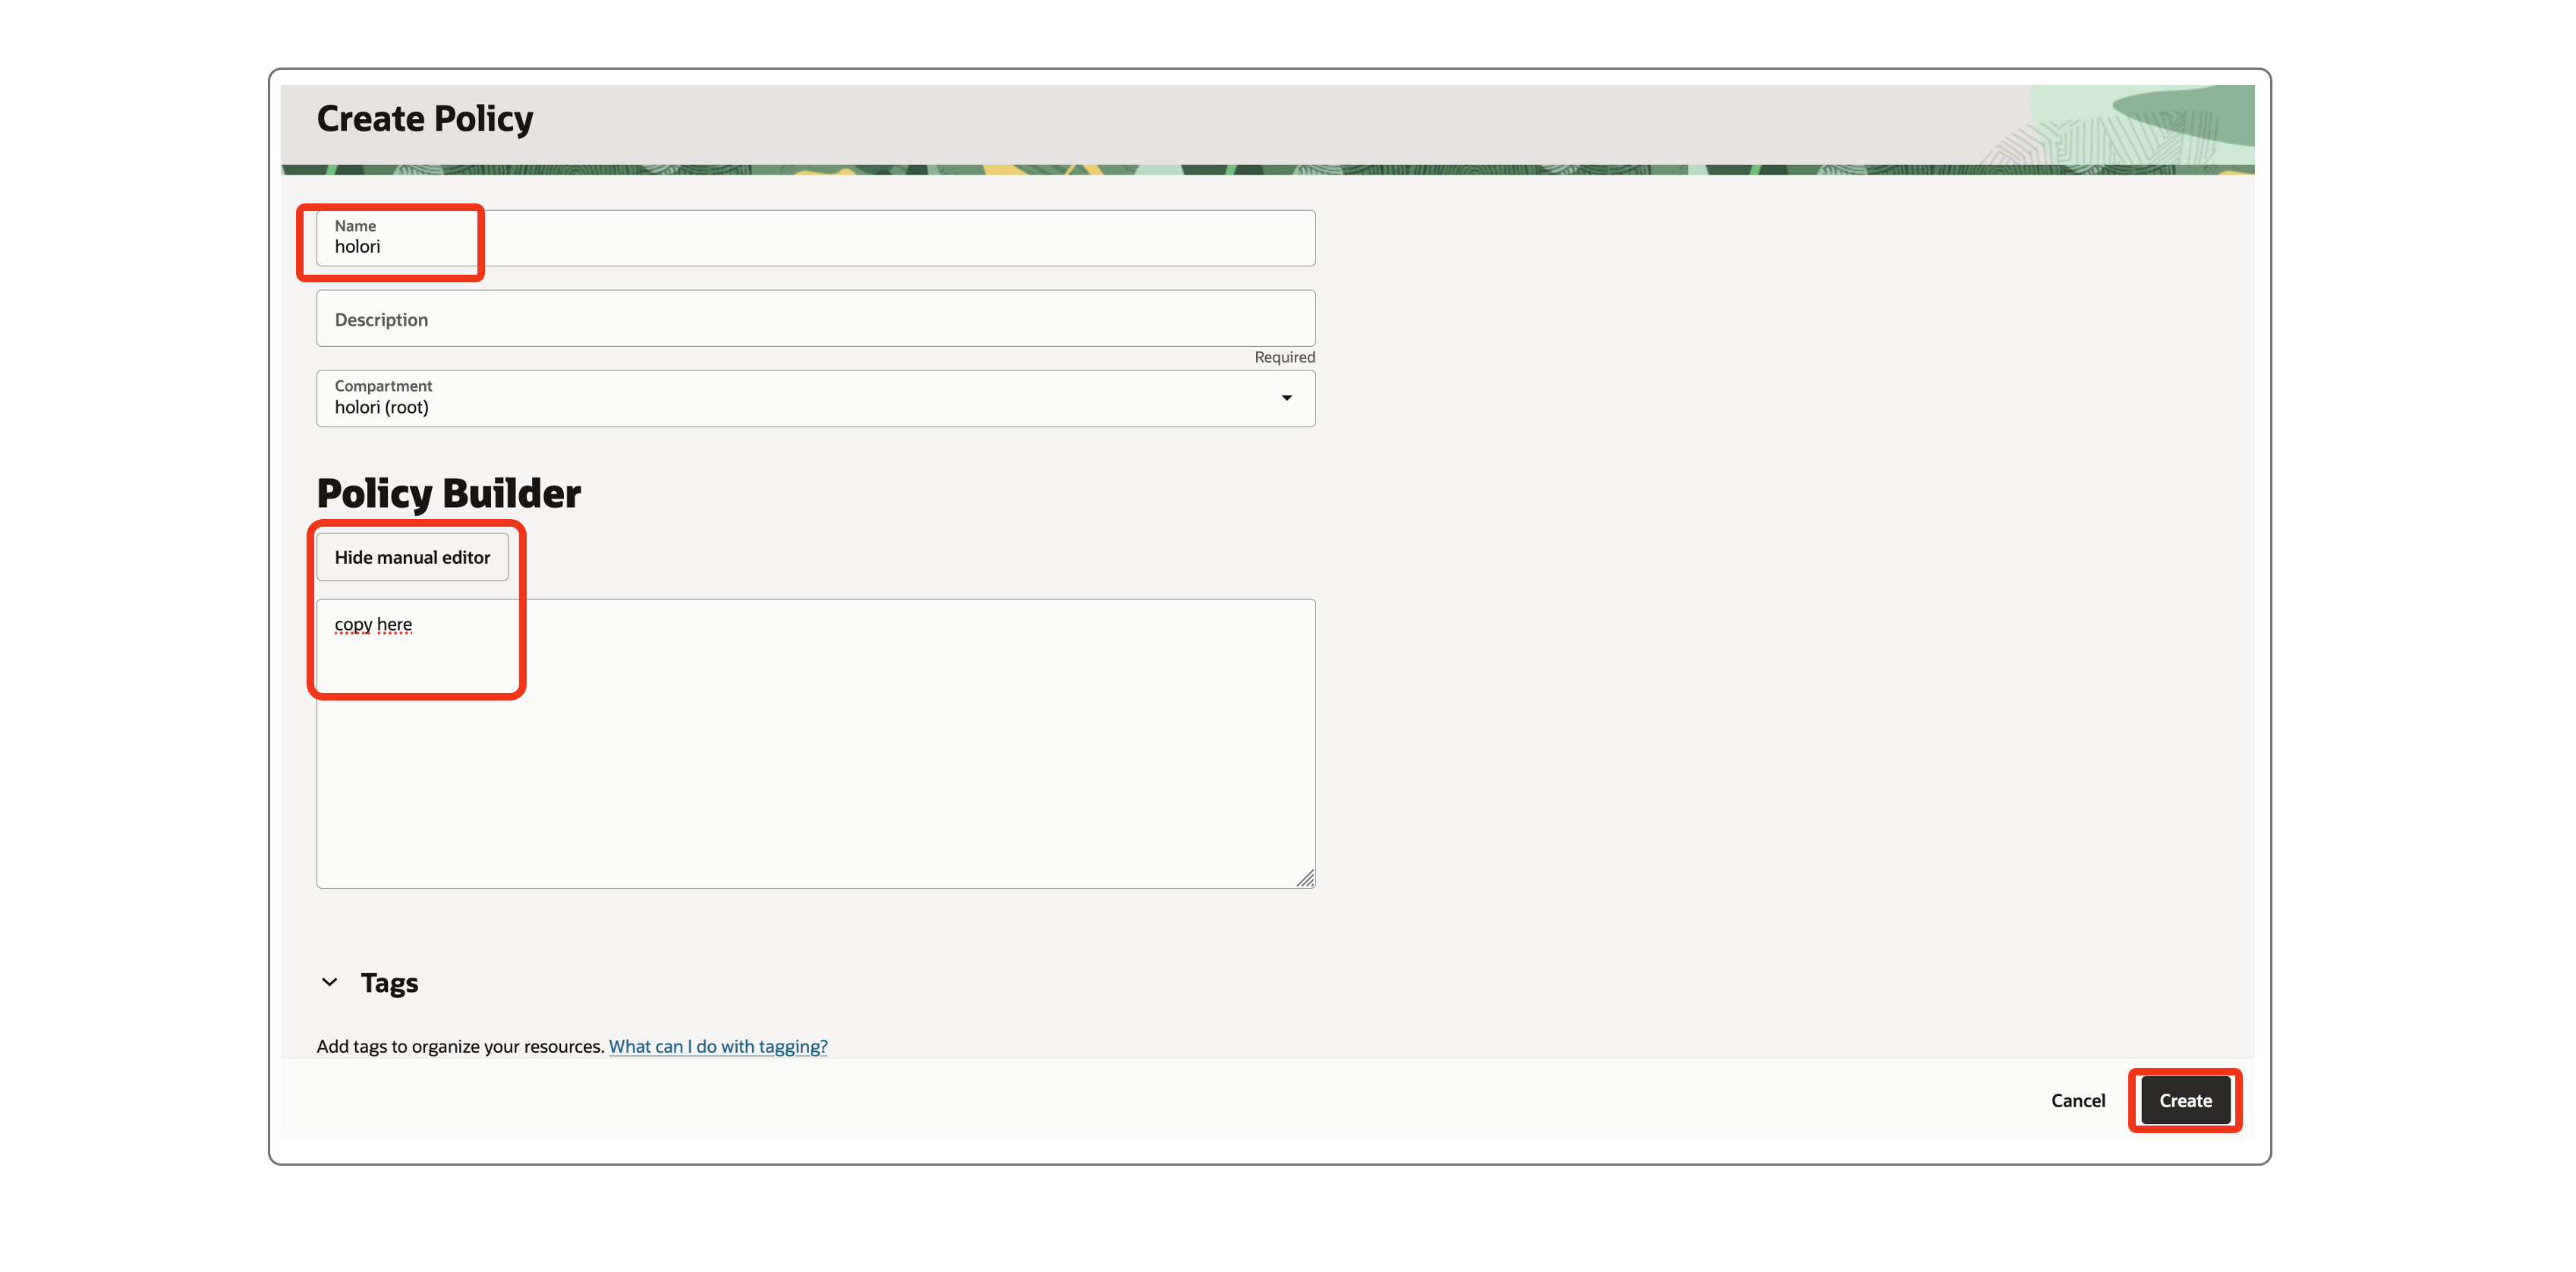
- Give it the same name "holori" as the group you created previously
- The selected compartment should be your (root) one
- In the Policy builder section, switch on the Show manual editor toggle
- In the text field, insert the policies you copy from the field on Holori App
- Back on the consome, click on Create at the bottom of the page
Step 9: Create a (or use an existing) database
Creating a dedicated database for Holori on OCI can be quite costly. We recommend using an existing database on another provider or an existing one on OCI to benefit from its quotas. Please don't hesitate to contact us using the in-app chat or by email to support(at)holori.com if you have any question or need assistance.
The same database can be used for multiple Focus accounts. In this case you must give a different table_name for each one of them.
Regardeless of the provider we need the following information:
- Protocol
- Username
- Passowrd
- Host
- Port
- Database
- Table Name (must be a different one for each Focus account), Holori will automatically take care of creating this table
- SSL Mode
- SSL Cert
Save and verify
Once all the steps above have been performed, click on "Save and Verify" at the bottom of the page. It can take up to 48 hours to have the data available in Holori.